How To Use Colored Pencils? Layering And Blending For Beginners


Gallery
You can create amazing art using colored pencils and explore the different dimensions that you had never seen as a kid.
Before beginning, it is important to read more about basic pencil holding techniques, coloring techniques, different types of shapes, figure drawing, perspective drawing, and many more. Here we will discuss more on the various uses of colored pencils and how to implement them in real-life drawings.
Colored pencil tutorials help a lot, but it is better to know the basics first. Before being used in art, colored pencils were actually used for marking and checking. Colored pencils added a contrastive color for marking documents.
For example, blue and red colored pencils were used by print editors to mark mistakes and corrections in drafts. Colored pencils were created in the early 20th century.
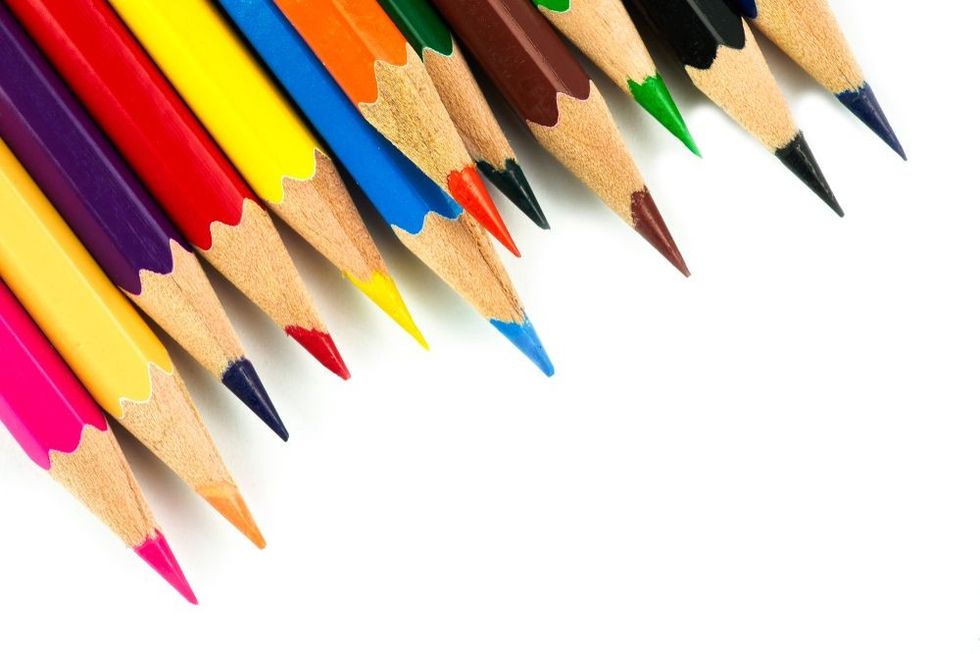
Manufacturing them has been a revelation for an artist who likes creating pencil art from scratch. Colored pencils are one of the most versatile mediums to create spectacular art. In most cases, you just need a colored pencil and paper to get started.
A colored pencil is made of a core of colored pigment which is protected by a wood casing. The wooden casing used for the pigments is generally cedar.
This is the basic definition of a colored pencil. However, there exist colored pencils that do not have wooden casing at all. A colored pencil is similar to a graphite pencil.
Graphite pencils use clay as a binder, while to bind colored pencil pigments oils or wax are used. There can be additives and other binding agents used too.
The only exception is the use of colored pigments for creating through colored pencils. These materials to bind helps the pigments to move and blend across the paper smoothly. Colored pencils are quite often used by hand illustrators.
Color pencils vary with the binder type keeping the pigment intact. The binder determines the hardness or softness of the lead inside.
Good quality pencils will have a higher ratio of pigment to the binder. Depending on the binder used, the core is either oil-based, wax-based, or Arabic-gum based. The Arabic-gum based colored pencils are also called watercolor or water-soluble pencils.
Wax-based colored pencils use a wax binder to hold the pigment with the core of the colored pencil as we already discussed. The colored pencil you used with the drawing paper in elementary school was probably wax-based colored pencils.
Artists too use these wax-based colored pencils to create art, however of tighter quality with soft lead.
In comparison to oil-based colored pencils, wax-based colored pencils are easier to blend and are much easier to layer.
This is known as an easily blending pencil with heat, colorless blenders, and solvent-based ones, although a soft lead core is needed. Wax-based colored pencils break easily as they have a soft core, unlike oil-based colored pencils.
It is easier to erase the pigment off the paper in wax-based colored pencils as they lay less color on the paper. Remember to brush and dust your drawing paper often as wax-based colored pencils create debris on the page and might destroy the finite details of the artist.
Wax bloom on the page is possible too, so you can use either a soft cloth to wipe off the glaze of the paper or a fixative.
A colored pencil drawing can employ various kinds of pencil art techniques and oil-based colored pencils help to achieve that. Oil-based colored pencils use an oil binder that is vegetable-based to hold the pigment within the core.
Although the core of the colored pencils might still have wax, the concentration of oil is higher. Due to the presence of a hard lead core, the chance of breaking is less than the wax counterpart.
They do not blend easily like wax-based colored pencils and are much tougher while putting layers. These colored pencils are much more expensive than wax-based ones and are only found in art supply stores.
Watercolor pencils, also known as water-soluble pencils, employ Arabic-gum binders for the pigments. This binder is activated with the use of water which helps in blending, similar to watercolors.
There are many different factors to see while considering which colored pencil to buy including texture, materials used, the shade of colors, quality, and other details. As there are different kinds of pencils, it is advised to first start with student-grade colored pencils.
It will give you a basic structure of the artwork you are planning to do with fewer techniques. With time, you can jump to professional-grade color pencils.
The tooth of the paper is also important to choose correctly as it is important to find a paper for your artwork that at least has a little tooth.
The tooth of the paper helps the colored pencil pigment to hold onto the surface of the paper. If the paper is smooth, it might be difficult to put in the layers.
If you enjoyed this article, why not also read about how to grow lima beans and how to raise a chick here on Kidadl?
How to blend colored pencils?
Having fewer colored pencils, it is important to create a color mixing chart to get as many colors as possible. This will help in blending quite easily and maintain the quality without wasting much time.
It is very important to understand color before starting to blend. Choosing the right set of colors and colored pencil sets while blending and drawing will give you better visibility and contrast in the paper.
Blending colored pencil artwork is not the same as drawing with graphite. To achieve the best blend in a colored pencil drawing medium, there are three different blending techniques - pencil blending, solvent blending, or dry blending.
Pencil blending or burnishing - This method called burnishing uses pressure to combine all the layers completely fill the paper with color, along with the tooth of the paper. Burnishing provides a shiny and smooth appearance to the artwork in the paper.
It is recommended to use a sharp colored pencil for burnishing to help complete the artwork quickly. There are colorless blenders available in any local art store.
These colorless blenders are wax-colored pencils that have no pigments and can be used to blend and soften the edge of the artwork. Burnishing is helpful in a drawing, but solvents can take it up a level.
Solvent blending - The binding of colored pencil sets is disrupted by solvents that actually allow for color blending. The coloring strokes in a piece of art are now decreased to give the art more of a smooth surface.
There are various solvents that can be used with a colored pencil. However, before going for a solvent, it is imperative to first check the resistance to the quality of the paper surface. And before reapplying color to the surface, it is important to first let the solvent medium dry.
You can remove the excess solvents by wiping the paper with paper towels or a cloth. Some different solvents used to create this quality in the art are: Turpentine made from the resin of pine trees can disrupt the wax binder.
It is more effective than rubbing alcohol on paper. Stronger paper is needed for the use of turpentine and moderate pressure needs to be applied.
Additionally, it will give a watercolor effect. The second way is by rubbing alcohol. It helps in moving the pigment all throughout the art in the paper.
The alcohol used should be less than 70% isopropyl alcohol. If a stronger one is used, the color pigment from the colored pencil will start getting erased.
Applied pressure needs to be checked too. Rubber cement thinner is a medium that is used by mixing a solvent with latex.
These methods work similar to turpentine but produce better effectiveness in breaking the wax binder. A moderate pressure brush can be used. You can also use mineral oil and mineral spirits.
Oil is actually used as a lubricant, moisturizer, or laxative and is food-safe. Mineral spirits on the other hand help in finishes and are used as a thinner.
Odorless ones do not have harmful chemicals and are used for blending. You can apply light pressure to the surface while blending.
The last way is by using dry blending. They are not as effective as the others but still manage to produce a satisfactory result to some extent. You can even blend the pigments by using a blender which is often a colorless blending pencil.
A blender can mix and blend two colors into one. Blenders will help produce a different gradient.
Colored Pencil Techniques
Let us learn a few tips and tricks of using a colored pencil to produce art with brilliant skills with colors.
The first thing we should know is while applying pressure with a colored pencil, the hue will be intensified, but it will not turn from light to dark. It is very important to work with light to dark hues, as light colors are not as obvious as dark colors.
The perfect way for an artist to get a darker color from a light one is to layer a little darker color over it.
Mixing the different colors available is important as you won't get all the colors in the colored pencil box. The box will only have a few colored pencils and it is up to you to create more tones, texture, hues, and shades with the box you have.
These different colors and textures on the surface can be created on the page with some blending and layering.
Layering your colors is important. If you learn to layer your colors properly, you will be able to provide more depth and details to the drawing. It will become more smooth. While layering, use darker blues or darker browns right before shading with black.
Drawing soft with black color will help you provide even more layers over the drawing that will give the painting a more refined look with cool highlights and a different shade each time.
It is important to use a brush to move pigments and blend with the whole drawing to mainly fill in the white parts of the paper and control the painting as your own.
Layering pigments will help you achieve a light layer over the drawing. This lighter layering can be done by using a lighter color or a lighter neighboring color. Multiple layers might be needed to do this.
While shading, use the broadest edge of the pencil lead by holding the pencil sideways. You will be able to control your draw this way by keeping the texture of the layers light and smooth.
A hand-sharpener with sharp blades should be always used. Colored pencils are very fragile and using the right sharpener will give you the most of them while drawing. However, the pencil might break inside the sharpener. Also, keep a lookout as a wax or oil binder might destroy a pencil sharpener.
Keep in mind the quality of the coloring medium, which is the drawing paper. The tooth of the paper needs to be checked before drawing as the technique fully depends on the paper medium and the roughness in it.
Apart from these the brand of the pencils also matters. With each brand of pencils, you will get different pigments and colors.
Layering With Colored Pencils
There are mainly two colored pencil technique tips to make layers out of colors.
Maintaining the texture of the paper medium is important as any technique. This gives you the base of the drawing and highlights the art and colors you have been using.
The tooth of the sheet is very important as it catches and holds the pencil. With this tooth, you can draw layer after layer if the technique is right.
A light or medium touch can be applied while applying color to the art. Do not press hard as you will burnish the paper which will, in turn, create paper wax. Continuing to draw over it is a wrong technique as the strokes will skip the surface leaving no color on the paper.
The strokes will also deposit blobs of color on the paper destroying the painting. Unsightly lines can also occur.
The second tip to layering includes using different color shades in your drawing rather than the black color. Black strokes do not feel like a part of the shading sometimes and might ruin the beautiful picture.
The technique of layering one color on another helps in creating shadows and highlights on an object and is a sign to become a better artist. This is done by layering a lighter color over a darker one. Start with a light grip and go from there.
Tips For Shading With Colored Pencil
There are a few tips that you can go through to start with some brilliant bit of shading in your drawings.
Holding the pencil sideways will allow you the control to first lay down a light base of color. You can then add layers until you get the desired hue to your art. It also minimizes unsightly lines and gives smooth color.
You can also practice by allowing different contrasting colors into one another. Try blending them as much as possible and it will give you a new trick to work on. Avoid using black and white while creating shadows and highlights.
Shading different colors give you a new perspective to work on while giving the art a more vibrant look. Using black can become too strong of a hue.
It will just make your artwork flat. Also, avoid using erasers and do not smudge. It will not only make your image look dirty, but also reduce the paper quality.
Here at Kidadl, we have carefully created lots of interesting family-friendly facts for everyone to enjoy! If you liked our suggestions for how to use colored pencils, then why not take a look at how to make a waterfall or how to hold a pencil.


We Want Your Photos!
More for You


See All
Bachelor of Arts specializing in English
Ritwik BhuyanBachelor of Arts specializing in English
A skilled content writer, Ritwik holds a Bachelor's degree in English from Delhi University. He has refined his writing abilities through his past experience at PenVelope and his current role at Kidadl. In addition to his proficiency in writing, Ritwik has pursued his passion for flying by achieving CPL training and becoming a licensed commercial pilot. This diverse skill set highlights his commitment to exploring multiple fields. Ritwik's experience in the aviation industry has provided him with a unique perspective and attention to detail, which he brings to his writing.
Bachelor of Commerce
Niyati ParabBachelor of Commerce
With a background in digital marketing, Niyati brings her expertise to ensure accuracy and authenticity in every piece of content. She has previously written articles for MuseumFacts, a history web magazine, while also handling its digital marketing. In addition to her marketing skills, Niyati is fluent in six languages and has a Commerce degree from Savitribai Phule Pune University. She has also been recognized for her public speaking abilities, holding the position of Vice President of Education at the Toastmasters Club of Pune, where she won several awards and represented the club in writing and speech contests at the area level.
Disclaimer
1) Kidadl is independent and to make our service free to you the reader we are supported by advertising. We hope you love our recommendations for products and services! What we suggest is selected independently by the Kidadl team. If you purchase using the Buy Now button we may earn a small commission. This does not influence our choices. Prices are correct and items are available at the time the article was published but we cannot guarantee that on the time of reading. Please note that Kidadl is a participant in the Amazon Services LLC Associates Program, an affiliate advertising program designed to provide a means for sites to earn advertising fees by advertising and linking to Amazon. We also link to other websites, but are not responsible for their content.
2) At Kidadl, we strive to recommend the very best activities and events. We will always aim to give you accurate information at the date of publication - however, information does change, so it’s important you do your own research, double-check and make the decision that is right for your family. We recognise that not all activities and ideas are appropriate for all children and families or in all circumstances. Our recommended activities are based on age but these are a guide. We recommend that these ideas are used as inspiration, that ideas are undertaken with appropriate adult supervision, and that each adult uses their own discretion and knowledge of their children to consider the safety and suitability. Kidadl cannot accept liability for the execution of these ideas, and parental supervision is advised at all times, as safety is paramount. Anyone using the information provided by Kidadl does so at their own risk and we can not accept liability if things go wrong.
3) Because we are an educational resource, we have quotes and facts about a range of historical and modern figures. We do not endorse the actions of or rhetoric of all the people included in these collections, but we think they are important for growing minds to learn about under the guidance of parents or guardians.