How To Make An Origami Penguin: Easy Step By Step Guide


Gallery
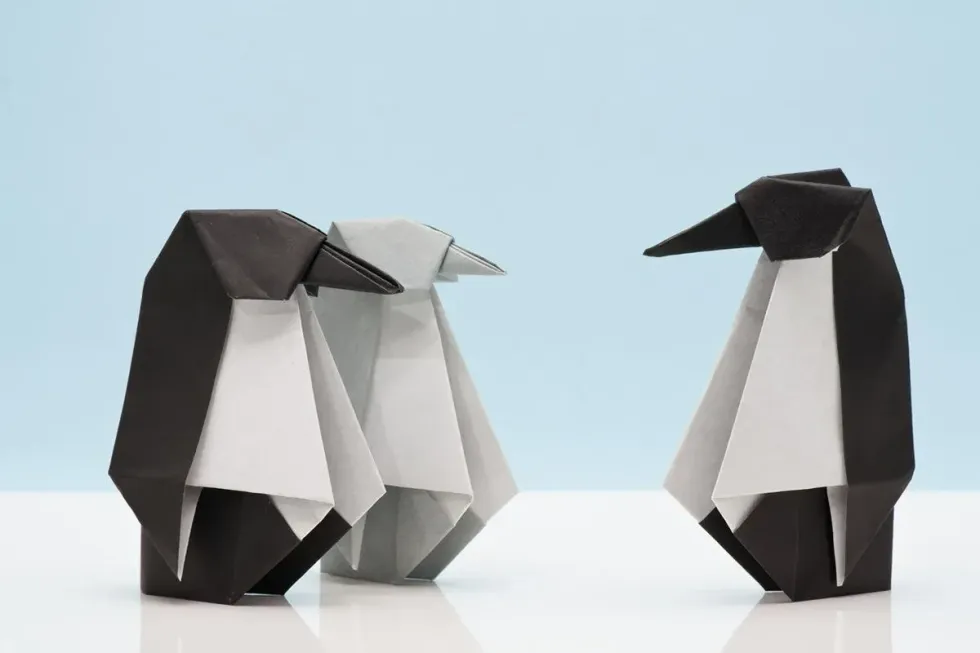
Image © joel-t, under a Creative Commons license.
Origami is an ancient paper folding craft thought to originate in Asia, first in China when paper was first invented, and then later transported to Japan by Buddhist monks.
Completed origami items were originally used for ceremonial occasions or gifts, but paper folding is now a craft activity enjoyed all over the world for fun. There's something for all ages and abilities to try, and learning how to make origami animals is a firm family favourite.
Here we celebrate this majestic flightless bird, the penguin, and while they are feasting on fish, squid, and krill in their southern hemisphere homes, you can be making your own easy origami penguin family with this step by step guide.
Penguin Origami Materials
This step by step guide is to make one traditional paper penguin that will stand up on a flat surface. This is one of the easiest freestanding models you can make, so you may end up with a whole penguin family. We've also recommended the best materials for the job and where to buy them.
To make one penguin you will need:
1 square piece of origami paper with one side coloured and one side plain, like this black one. Wrapping paper or kids craft paper will also fold well. You may need to help your children cut the paper to size.
A ruler or bone folder may help keep the creases neat.
Pens to add some detail to the face. We've found some white pens so the ink will stand out against the black paper.

Image © rawpixel.com, under a Creative Commons license.
Origami Penguin Instructions
1. Lay your piece of paper coloured side up on a flat surface so it's a diamond shape.
2. Fold the paper in half from left to right.
3. Next, fold the top layer over, creasing at the top first to get a neat point, and then all the way down the fold. This will look like a tall narrow triangle of plain paper. The crease is about 3cm down the bottom right length of the shape.
4. Turn the paper over and repeat the same steps so that the flaps line up with each other.
5. Open out the paper with the coloured side facing up, and fold the bottom point up to form a triangle.
6. Turn the paper over and fold the top point down, but do this lightly, no firm crease is needed yet.
7. Fold the penguin in half so the left half is sitting behind the right half.
8. Hold the model midway down the top flap, then move the head flap out into position, pinching the paper to keep it in place.
9. Your penguin is now complete, so if you want to you can add some eyes or colour in the beak.

Image © andreycherkasov, under a Creative Commons license.
Top Tips
These origami penguin instructions can be applied to any size square paper, so you could make a whole penguin family of different sizes.
Why not put your children's crafty skills to the test, and challenge them to make a habitat for your origami penguin family to live in? Cotton wool, white felt, glitter glue, and cardboard could all be used to create a magical antarctic world.

Image © rawpixel.com, under a Creative Commons license.
Quick Origami Penguin Design
There are around 17 species of these expert swimmers and divers, so we thought it'd be fun to add another 'how to make a penguin' project to the mix. The origami difficulty level on this is also easy, so all the family can join in, using their paper squares to make cool greetings cards.
1. Fold the paper in half to make a triangle, then open out the paper, rotate it, and fold in half again. The creases will make a cross on the paper.
2. Lay the paper down so it looks like a diamond, then fold the bottom tip up towards the top, leaving approximately 1 1/2 cm of the bottom layer visible as a border all the way around. Use the centre crease as a guide to line your fold up.
3. Fold down the tip of this top layer to make a beak around 3cm long.
4. Turn the paper over and fold in each side towards the centre; they will overlap a little at this point.
5. Fold each side back on itself, almost halfway across. The straight edges should line up, with a little triangle laying over the edge.
6. Fold the top down a little and your penguin is complete.


We Want Your Photos!
More for You
See All
Diploma of Higher Education specializing in Leisure Management
Lauren JohnDiploma of Higher Education specializing in Leisure Management
With roots in Essex and Welsh heritage, Lauren is an avid crafter and nature enthusiast. She has a Diploma in Higher Education with a specialization in Leisure Management from Writtle University College. In her spare time, she can be found inventing new games and outdoor activities to enjoy with her football-loving nephew.
Disclaimer
1) Kidadl is independent and to make our service free to you the reader we are supported by advertising. We hope you love our recommendations for products and services! What we suggest is selected independently by the Kidadl team. If you purchase using the Buy Now button we may earn a small commission. This does not influence our choices. Prices are correct and items are available at the time the article was published but we cannot guarantee that on the time of reading. Please note that Kidadl is a participant in the Amazon Services LLC Associates Program, an affiliate advertising program designed to provide a means for sites to earn advertising fees by advertising and linking to Amazon. We also link to other websites, but are not responsible for their content.
2) At Kidadl, we strive to recommend the very best activities and events. We will always aim to give you accurate information at the date of publication - however, information does change, so it’s important you do your own research, double-check and make the decision that is right for your family. We recognise that not all activities and ideas are appropriate for all children and families or in all circumstances. Our recommended activities are based on age but these are a guide. We recommend that these ideas are used as inspiration, that ideas are undertaken with appropriate adult supervision, and that each adult uses their own discretion and knowledge of their children to consider the safety and suitability. Kidadl cannot accept liability for the execution of these ideas, and parental supervision is advised at all times, as safety is paramount. Anyone using the information provided by Kidadl does so at their own risk and we can not accept liability if things go wrong.
3) Because we are an educational resource, we have quotes and facts about a range of historical and modern figures. We do not endorse the actions of or rhetoric of all the people included in these collections, but we think they are important for growing minds to learn about under the guidance of parents or guardians.