How To Make An Origami Robin

Lauren John
Dec 12, 2023 By Lauren John
Originally Published on Sep 14, 2020
Children's art project.
?
Age: 0-99
Read time: 3.5 Min

From crochet and knitting, to paper cutting, there is a wide choice of robin craft projects out there, but robin origami projects are few and far between.

These beautiful birds deserve a place at the Christmas table, so we've put together a 'cheat's method' where you can take a popular origami bird project and then transform it into an origami robin redbreast.  

Traditional origami may just involve the use of paper, but when it comes to kids' projects, the use of pens, pencils or coloured paper is definitely encouraged for decoration.

Follow the step by step instructions below to make your origami bird base, and don't forget to take a look at our origami robin hints and tips for decoration ideas and where to find the ultimate origami robin challenge.

To Make An Origami Robin You Will Need

A square of origami paper for each origami robin. This robin origami project uses plain white paper, but inkjet or craft paper will also work well.

Pens or pencils for colouring in your origami bird to transform it into an origami robin.

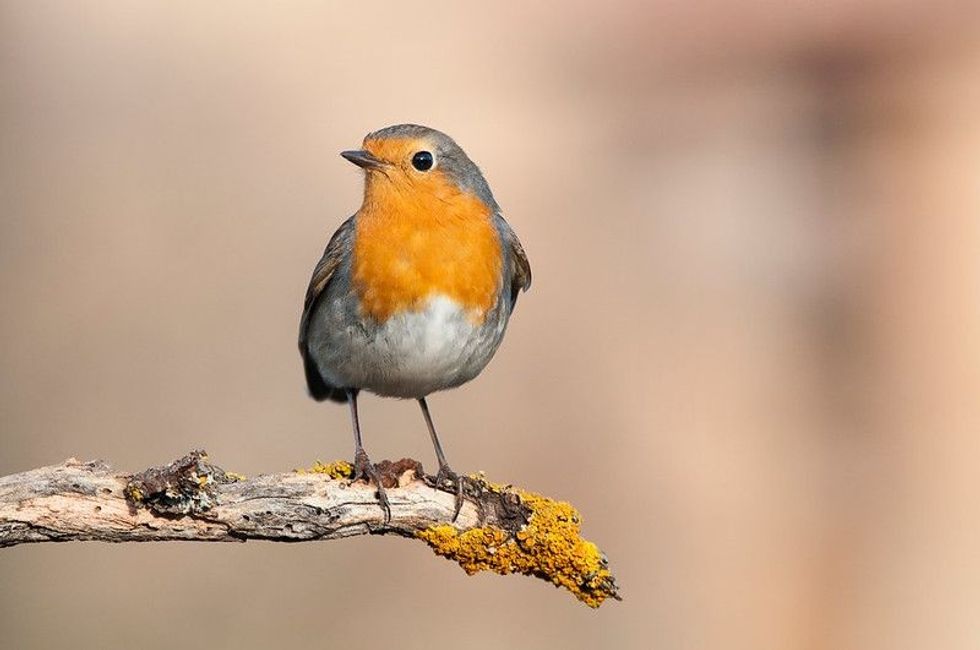
Robin erithacus rubecula standing on a branch.

How To Make An Origami Bird

This step by step method will make one generic origami bird that can be turned into an origami robin using our hints and tips.

Step 1. To make your origami bird, firstly your sheet of paper on a flat surface like a diamond and fold in half.

Step 2. Open out the origami paper, then fold the left and right edges to the centre crease line to make a kite shape.

Step 3. Fold the top triangle part backward, creasing and flattening a fold to line up with the top edges of the previous folds. This will make a triangle shape.

Step 4. Fold the top right tip of your origami bird into the centre line, creasing along the outer fold. Repeat this step on the opposite side, so both parts of the origami paper are symmetrical.

Step 5. Lift up the top right flap. Take the inner tip of the paper and pull it across and down over the right edge. Crease the inner fold line you have created. The top layer of origami paper will naturally fall down over this to create a new shape. Flatten any creases if needed.

Step 6.  For the next step, fold up the tips you have just made on the left and right hand sides, creating a fold line from the centre tip of the diamond above, going across the body of the bird.

Step 7. Measure 4cm from the bottom tip of the origami bird. Lift the paper up and over, making a crease line across at the 4 cm mark.

Step 8. The next step is to fold the top piece over so the pointed tip is pointing downwards. You will end up with a zig zag type fold with the tip of the fold pointing downwards.

Step 9. Fold in half from right to left, then turn your bird anticlockwise, so the origami is now length ways. Your basic origami bird is almost complete.

Step 10. To make the beak for your origami bird, take the top left tip and fold it in on itself, creating what is called a pocket fold. There will be a flat edge forming the top of the origami bird head, and the nose will be poking out the end of the pocket.

Step 11. The final step is to turn your basic freestanding model (or models, if you've made more than one) into an origami robin. Use colouring pencils or pens to add a brown body, redbreast, and eyes. Don't forget to snap a picture to show all your friends when you've finished decorating your origami robin.

Top Tips For Making A Great Origami Robin

As an alternative to colouring in, why not use some robin themed Christmas craft or wrapping paper and fold your origami robin using that?

If you'd like to try another stand-up origami robin model, have a look online for pre-designed origami robin templates that can be downloaded.

For really advanced paper folders, there are Youtube videos detailing some great origami robin folding instructions. Some of these have many complicated folding steps, but adults or older children may be up for this origami robin challenge. Good luck!

We Want Your Photos!

We Want Your Photos!

Do you have a photo you are happy to share that would improve this article?
Email your photos

More for You

See All

Written by Lauren John

Diploma of Higher Education specializing in Leisure Management

Lauren John picture

Lauren JohnDiploma of Higher Education specializing in Leisure Management

With roots in Essex and Welsh heritage, Lauren is an avid crafter and nature enthusiast. She has a Diploma in Higher Education with a specialization in Leisure Management from Writtle University College. In her spare time, she can be found inventing new games and outdoor activities to enjoy with her football-loving nephew.

Read full bio >