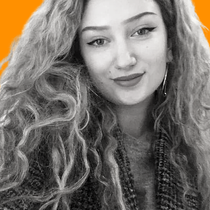
How To Have An Easy DIY Home Spa Day With Your Family

Gallery
Trying to keep the whole family entertained may feel a little stressful. So, why not take off the pressure and treat your family to a luxurious DIY spa day in the comfort of your own home?
From cucumber slices to make-your-own bath bombs, we have a host of super fun and easy to make 'treatments' and special touches to create a DIY spa that kids will love!
Set Up Your Spa
Using just a few bits and pieces from around the house, you can create the perfect atmosphere for some serious relaxation. Here are our top tips on how to set up your home spa:
- Choose an area you'd like to set up- anywhere with some space will do, as long as you don't mind a couple of potential spillages!
- Speaking of spillages, now is the time to lay out your towels. One per person, lay them out horizontally with a little space in between, (and an additional rolled up smaller towel if you have it).
It's a good idea to pop the towels near a seating area, so the kids have somewhere to sit while enjoying the treatments!
- Dim the lights, and put on some calming music. We love this playlist for some kid-friendly chillout time. Alternatively, check out our audiobook to keep the kids entertained while they're relaxing.
- All set? Now you're ready to get stuck into your day of DIY fun! The following ideas are some great suggestions on how to get started.
DIY Spa Flip Flops
The ultimate accessory for any DIY spa day, these adorable flip-flops not only help prevent mess but can be made easily with things from around the house.
You will need:
Flip Flops
An old towel
A hot glue gun
Scissors
Method:
- Using your scissors, cut your towel into four thin strips roughly the length of the flip flop straps.
- Carefully, use your hot glue gun to apply glue along the length of the straps. Firmly press the towel strips on top so the straps are fully covered.
- Now cut a strip of towel about 30cm long and 2cm wide (this can be adjusted depending on the size of the flip flop). Tie into a simple bow.
- Again, use your glue gun to attach the bow to the connecting part of the straps.
- Repeat on the other flip flop.
- Voila! You now have your very own wearable pair of luxurious spa slippers!
Get Your Zen On
If it can take a little while for the kids to wind down, our kids' yoga post covers a range of ideas that are not only fun but will get the family doing some gentle exercise while also encouraging calm.
Strawberry Pink Fizz
Are we all suitably relaxed? Pass out some of this homemade child-friendly fizz to turn your kids' spa day into a spa party! It's natural, sugar-free and deliciously fruity.
You will need:
- 400g strawberries
- 2L carbonated water
- Honey, to taste
Method:
- Chop up the washed strawberries, and blitz in a blender until smooth. If you don't have a blender or food processor, you can always mash them using a fork; just try and make the mixture as smooth as possible.
- Place the berry mixture into a sieve/ strainer above a bowl, and push as much of the pulp through as you can.
- Mix in 3-4 tablespoons of honey to your strawberries.
- Mix the strawberry puree with your carbonated water; use about 3 tablespoons for every 200ml water.
- Taste, and add more honey if you like.
- Serve in cups, glasses, or even champagne flutes!
DIY Edible Face Masks
These face masks are suitable for young skin and are the perfect addition to the kids' spa. The masks are also completely edible; you could even use the leftovers for some spa snacks.
Top tip: While these masks are all-natural and safe for sensitive skin if you or your child does experience irritation make sure to rinse the mask off right away.
Sweet Chocolate Face Mask
This face mask contains only 3 ingredients; not only will the cocoa powder and yoghurt help clear and detoxify skin, but it's also pretty yummy!
You will need:
60g unsweetened cocoa
120ml plain yoghurt
60g honey (about 4 tablespoons)
Optional: cucumber slices for the eyes!
Method:
- Mix together the ingredients.
- Apply the mixture to the face, making sure to avoid the eye area and hairline.
- Pop some cucumber slices on, and relax for 10 minutes.
- Gently wash off with warm water and pat dry. Apply some moisturiser if desired.
Honey, Banana & Avocado Face Mask

As well as being one of your 5-a-day, avocados are also great for the skin! The banana in this face mask also adds moisture, leaving the skin feeling silky smooth.
You will need:
- 1/2 an avocado
- 1/2 a ripe banana (save the other half of the banana and avocado for our hair mask recipe below!)
- 1 tablespoon honey
Instructions:
- Mash the banana and avocado in a bowl, using the back of a fork.
- Add the honey and mix in well.
- Apply to the face and leave for 10-20 minutes.
- Wash thoroughly and pat the face dry.
Hair Mask
If you or your kid's hair needs a little TLC, this natural hair mask is great for adding moisture and taming frizz, and you can happily do one of your other DIY spa day activities while you're waiting for the mask to soak in. This recipe works great on textured hair but can be used with any hair type.
We recommend using once or twice a month to give hair a moisture boost!
Top Tip: For this treatment, you may prefer to move your DIY spa to the bathroom for minimal mess.
You will need:
- Half a banana
- Half an avocado
- 1 tablespoon extra virgin olive oil (castor oil, jojoba oil or coconut oil also work)
- A shower cap or clingfilm
Method:
- Mash all the ingredients together in a bowl (you could also blend them if you like).
- Apply to dry hair, focusing particularly on the mid-lengths and ends.
- Put on a shower cap- if you don't have one, you can wrap the hair in clingfilm (might sound strange, but it works!)
- Leave for thirty minutes to an hour.
- Wash the hair normally with shampoo and conditioner and allow to dry naturally
- Enjoy silky smooth, moisturised locks!
DIY Mini Bath Bombs
No DIY spa day is complete without bath bombs! These adorable bath bombs are not only fun for kids to make, but they are an excellent source of entertainment at bath time. This recipe makes 8-10 mini bath bombs, depending on the size of your mould.
You will need:
- 120g bicarbonate of soda
- 60g citric acid (this is what makes the bath bombs 'fizz'- you can buy this in larger supermarkets)
- 60g Epsom salt
- 60g cornstarch
- 30ml of olive oil or coconut oil
- Liquid food colouring of your choice (purple, blue, yellow and red work well for pastel bombs)
- Essential oil of your choice (lavender, rose, ylang-ylang, and bergamot are great calming scents)
- 50ml water
A mould- mini muffin baking trays work great for this, but any shape is fine. You could also try using an ice cube tray, yoghurt pots cut in half, biscuit cutters, or you can mould the mixture with your hands.
Method:
- Add the dry ingredients to a large bowl and mix together.
- In a small bowl, mix the oils and food colouring until well combined.
- Drop the oil mixture into the dry ingredients a little at a time, mixing constantly. When done, add a few drops of water- it will fizz due to the citric acid but don't panic! You are looking for a mixture that isn't wet but is slightly clumpy,
- Now, start putting your mixture into your chosen mould. The key is to make sure the mixture is packed in VERY tightly- this will help stop your bath bombs from crumbling. Alternately, mould the bath bombs with your hands- just make sure they are pressed tightly.
- Leave for a few hours until fully dry, and they are ready to use!
DIY Hand & Foot Soak
This relaxing kids spa treatment is also suitable for the grown-ups as a great way to relieve aches and feels super luxurious. The Epsom salt helps reduce inflammation and exfoliates, while the relaxing essential oils will fill your DIY spa with calming scents.
Top Tip: If you want your home spa day to include manicures or pedicures, this a great way to prep the hands and feet.
You will need:
- 80g Epsom Salt
- A few drops of your favourite essential oils.
- Towels
- A basin or large bowl
- A chair
- Moisturiser
Method:
- Make sure you have a towel laid out on the ground with a chair, and a separate towel for drying the feet.
- Fill your basin with warm water- you only need enough to cover the feet/ hands.
- Add in the Epsom Salt, and a few drops of your essential oil.
- Put the feet in the basin and soak for up to 30 minutes (soak hands for around 10 minutes).
- Pat dry, and apply your favourite moisturiser!


We Want Your Photos!
More for You


See All
Diploma of Education, Fine Arts, Bachelor of Arts specializing in Illustration and Visual media
Sarah HallamDiploma of Education, Fine Arts, Bachelor of Arts specializing in Illustration and Visual media
With a Diploma in Education specializing in Fine Arts (Painting) and a Bachelor of Arts specializing in Illustration and Visual media from the University of Arts London, Sarah previously was a London-based teacher who brought her passion for art and culture to the classroom. Her creative endeavors include painting classes and experimenting with new recipes. She draws inspiration from the world around her and enjoys sharing her knowledge with others while sipping a cup of tea.
Disclaimer
1) Kidadl is independent and to make our service free to you the reader we are supported by advertising. We hope you love our recommendations for products and services! What we suggest is selected independently by the Kidadl team. If you purchase using the Buy Now button we may earn a small commission. This does not influence our choices. Prices are correct and items are available at the time the article was published but we cannot guarantee that on the time of reading. Please note that Kidadl is a participant in the Amazon Services LLC Associates Program, an affiliate advertising program designed to provide a means for sites to earn advertising fees by advertising and linking to Amazon. We also link to other websites, but are not responsible for their content.
2) At Kidadl, we strive to recommend the very best activities and events. We will always aim to give you accurate information at the date of publication - however, information does change, so it’s important you do your own research, double-check and make the decision that is right for your family. We recognise that not all activities and ideas are appropriate for all children and families or in all circumstances. Our recommended activities are based on age but these are a guide. We recommend that these ideas are used as inspiration, that ideas are undertaken with appropriate adult supervision, and that each adult uses their own discretion and knowledge of their children to consider the safety and suitability. Kidadl cannot accept liability for the execution of these ideas, and parental supervision is advised at all times, as safety is paramount. Anyone using the information provided by Kidadl does so at their own risk and we can not accept liability if things go wrong.
3) Because we are an educational resource, we have quotes and facts about a range of historical and modern figures. We do not endorse the actions of or rhetoric of all the people included in these collections, but we think they are important for growing minds to learn about under the guidance of parents or guardians.