How To Make Origami Pokemon: Four Great Characters


Gallery
Origami is a type of art that originated in Japan - it is the art of paper folding.
Pokemon is more than just one form of entertainment: it's the name shared by the famous TV cartoon, video game, toys and trading card game. A central theme in Pokemon is the collection of small creatures, which can be collected and battle one another.
Created in Japan, Pokemon is actually short for "pocket monsters" and has been loved by children and adults the world over.
You may have heard of the game 'Pokemon Go' or characters like Pikachu, Bulbasaur and Charmander.
It's good for kids to learn origami because it develops the imagination, fine motor skills and sense of colour. Following origami instructions helps to improve spatial awareness and concentration, boosting brain development also. So why not have a go at making these origami Pokemon characters?

Pokemon Origami Activities
Take a look at these easy origami Pokemon instructions to show you how to make Pokemon origami for hours on end. Educational and enlightening, origami Pokemon is an epic pastime.
1. Easy Origami Pikachu Head
Looking for some easy origami Pokemon instructions, how about a Pikachu origami tutorial? Young kids will love this easy origami tutorial of a Pikachu head!
Ages: 4+
You Will Need:
Square origami paper, yellow on one side and white on the other (20cm x 20cm). Since finding paper that's the right dimension, we recommend using this pack of origami paper for all of these crafts.
Black and red marker pens for drawing a face onto your origami Pikachu.
Image © sveta_rom, under a Creative Commons license.
Instructions:
1) Colour side down, rotate the paper square so that origami Pikachu looks like a diamond.
2) Fold the diamond in half, left to right, then unfold.
3) Fold the bottom half of the paper up to the top.
4) Fold the top half of the triangle down to the bottom of the triangle.
5) Fold the left and right edges diagonally, up towards the middle of the shape, forming a new origami Pikachu diamond.
6) Fold the corners on the left and right inwards, to the centre, creating two ears for origami Pikachu.
7) Fold each ear out, to the left and right, to make them appear however you like.
8) Fold in the corners on the left and right, slightly, get rid of the pointy cheeks.
9) Fold the bottom corner in slightly, to flatten the pointy chin.
10) Turn your origami Pikachu over, grab some markers and begin to draw the face!
2. Easy Origami Bulbasaur
Make your own Bulbasaur with this super easy origami tutorial - you could even play Pokemon Go in real life with it!
Ages: 5+
You Will Need:
Square origami paper that is blue on one side and white on the other (20cm x 20cm).
Black, green and red markers.
White marker (or Tippex).
Instructions:
1) Blue side down, rotate the paper square so that it looks like a diamond, then fold in half to create a horizontal crease. Keep folded to look like an upside-down triangle.
2) Take the top left corner and fold it across, so that the corner is on the middle of the right edge, then do the same with the right corner, so that its tip is on the middle of the left edge.
3)Take each new flap created and fold it back 2/3 of the way.
4) Rotate the Bulbasaur 90 degrees and fold the two flaps in the bottom-left corner inwards, so that there is a flat edge instead.
5) Turn over, rotate, and you'll now see Bulbasaur's head. Grab some markers and start adding details to his face.
Ages: 5+
You Will Need:
Instructions:
3. Easy Origami Litten
Ages: 5+
You Will Need:
Square origami paper, brown on one side and white on the other (20cm x 20cm).
Red, yellow and white markers.
Instructions:
1) Brown side down, fold the paper square in half diagonally, then open up and rotate so that the crease is vertical and the square looks like a diamond.
2) Take the right corner and fold the top-right edge into the centre, then unfold.
3) Fold the diamond in half vertically.
4) Fold both corners (left and right) in towards the bottom corner, forming a tiny paper diamond.
5) Fold the top corner in, about 1cm away from the centre of the diamond.
6) Cut a line from the tip of the folded corner to the top edge, creating two ears.
7) Fold the inner ears up such that the crease of the fold goes into the middle of the top edge.
8) Fold the ears down again, then take the bottom right layer from the bottom corner and fold it up, so that the crease ends where the two ears meet. Do the same for the bottom left layer.
9) Lifting these two bottom layers will reveal two other layers in the bottom corner. Take the first and fold it up so that the point is where the two ears meet.
10) Fold in the protruding corners on the left and right, tucking them in.
11) Fold the final bottom layer halfway up, completing Litten's mouth.
12) Grab some markers and get decorating!
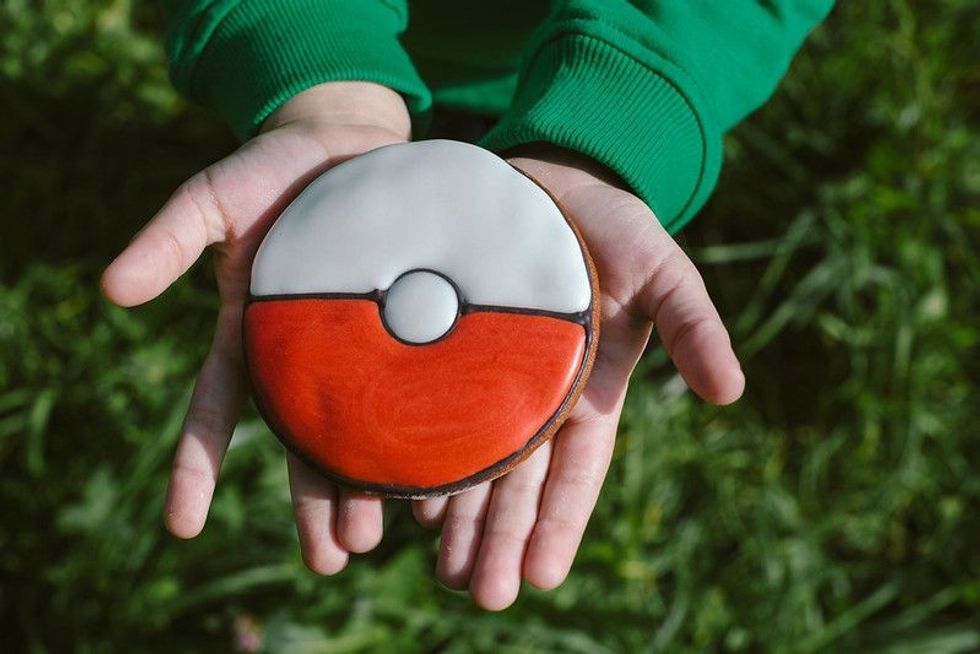
4. Epic Origami Pokemon Ball
Ages: 8+
You Will Need:
Red origami paper (20cm x 20cm).
White origami paper (20cm x 20cm).
Black A4 paper (2 sheets).
White A4 paper (1 sheet).
Instructions:
1) Fold the paper square in half, horizontally and vertically.
2) Fold all four corners into the centre to make a smaller paper square.
3) Turn over and fold in half again, horizontally and vertically.
4) Turn over and unfold the top and bottom flaps, so that they're sticking out.
5) Take hold of the left and right middle creases (the horizontal ones) and bring them towards each other. As you do so, fold the rest of the shape in half, so that the top corner sticking out folds to touch the bottom corner. You should end up with a diamond shape.
6) Take the corner on the right and lift the top flap up. Then bring it into the centre, folding it backwards. Do the same for the top left flap, so that its point is touching the folded right flap
7) Turn it over and repeat, folding the left and right flaps backwards on the other side.
8) Take one of your flaps and lift it back out again. Then open just that flap and fold it in, so that the crease that was sticking out is now folded inside your Pokémon ball.
9) Repeat for the other three flaps.
10) You should now have a six-sided shape with the left and right vertical edges being longer than the others
11) On one side only, life the flap on the top-right corner of your hexagon and fold it backwards by about half a centimetre, turning that corner into a small but wide triangle.
12) Repeat the step above for the top left corner, bottom left corner, and bottom right corner.
13) Turn over and repeat on all four flaps.
14) Turn back over and lift up one of the corner flaps, then unfold to reveal a large triangular crease, with a small triangle inside it (sharing the same base pleat).
15) Fold the base pleat in half, so that the large triangle folds in and the smaller triangle folds into it.
16) Repeat for the three other flaps on that side, and the four on the other side.
17) Open everything out to reveal two large flaps (one at the top and another at the bottom) and four flaps in between, beginning to form a box shape.
18) Fold in the two flaps on either side of the top flap, inwards so that the top flap is adjacent to the right and left sides of the paper Pokemon ball.
19) Repeat for the two flaps next to the large flap on the bottom.
20) Take the large top flap and fold it into the box, over the folds that formed it, then tuck in neatly,
21) Repeat for the bottom flaps and folds that formed it, tucking in neatly.
22) Remove the top flap again (now that creases have been formed) apply glue to the inside, then restore to its place so that it will stick. Repeat with the bottom flap.
23) Repeat all steps above, using white paper.
24) Cut one of the sheets of black A4 paper into inch-wide horizontal strips.
25) Fold each inch-wide strip in half, horizontally to half the height.
26) Unfold and apply a sparing amount of PVA glue to the first black strip, all around the inside.
27) Take the red half of your Pokemon ball and fold your black strip with PVA glue on it all over the edge, sticking them together. Repeat with another strip until the mouth of the red part of the Pokemon ball has a black border all around it.
28) Use your circle template to draw a circle on the other sheet of black paper, around 4cm in diameter (or the closest size your template has), then cut it out.
29) Use the template to draw two more circles on white paper, of diameters 3cm and 2cm (roughly). Cut out and stick on top of the black circle, in size order.
30) Stick the combined circle on one of the sides of the red half of your paper Pokemon ball: choose which side will be the front, and glue the centre of the combined circle onto the middle of that size, in the middle of the black edge also.
31) Place the red half on top of the white half to complete your paper Pokemon ball and you're done!
Main Image Editorial credit: Boiarkina Marina / Shutterstock.com


We Want Your Photos!
More for You


See All
Bachelor of Fine Arts specializing in Fine and Studio Arts
Temitope AdebowaleBachelor of Fine Arts specializing in Fine and Studio Arts
A Fine Art student from the Central Saint Martins, University of the Arts London, Temitope has a passion for learning and expressing herself creatively. She finds great reward in tutoring children from primary school up to sixth form. When she's not teaching or writing, you can find Temitope painting, editing photos, baking, or building LEGO with her nephew.
Disclaimer
1) Kidadl is independent and to make our service free to you the reader we are supported by advertising. We hope you love our recommendations for products and services! What we suggest is selected independently by the Kidadl team. If you purchase using the Buy Now button we may earn a small commission. This does not influence our choices. Prices are correct and items are available at the time the article was published but we cannot guarantee that on the time of reading. Please note that Kidadl is a participant in the Amazon Services LLC Associates Program, an affiliate advertising program designed to provide a means for sites to earn advertising fees by advertising and linking to Amazon. We also link to other websites, but are not responsible for their content.
2) At Kidadl, we strive to recommend the very best activities and events. We will always aim to give you accurate information at the date of publication - however, information does change, so it’s important you do your own research, double-check and make the decision that is right for your family. We recognise that not all activities and ideas are appropriate for all children and families or in all circumstances. Our recommended activities are based on age but these are a guide. We recommend that these ideas are used as inspiration, that ideas are undertaken with appropriate adult supervision, and that each adult uses their own discretion and knowledge of their children to consider the safety and suitability. Kidadl cannot accept liability for the execution of these ideas, and parental supervision is advised at all times, as safety is paramount. Anyone using the information provided by Kidadl does so at their own risk and we can not accept liability if things go wrong.
3) Because we are an educational resource, we have quotes and facts about a range of historical and modern figures. We do not endorse the actions of or rhetoric of all the people included in these collections, but we think they are important for growing minds to learn about under the guidance of parents or guardians.