10 Inventive Layers Of The Earth Projects


Gallery
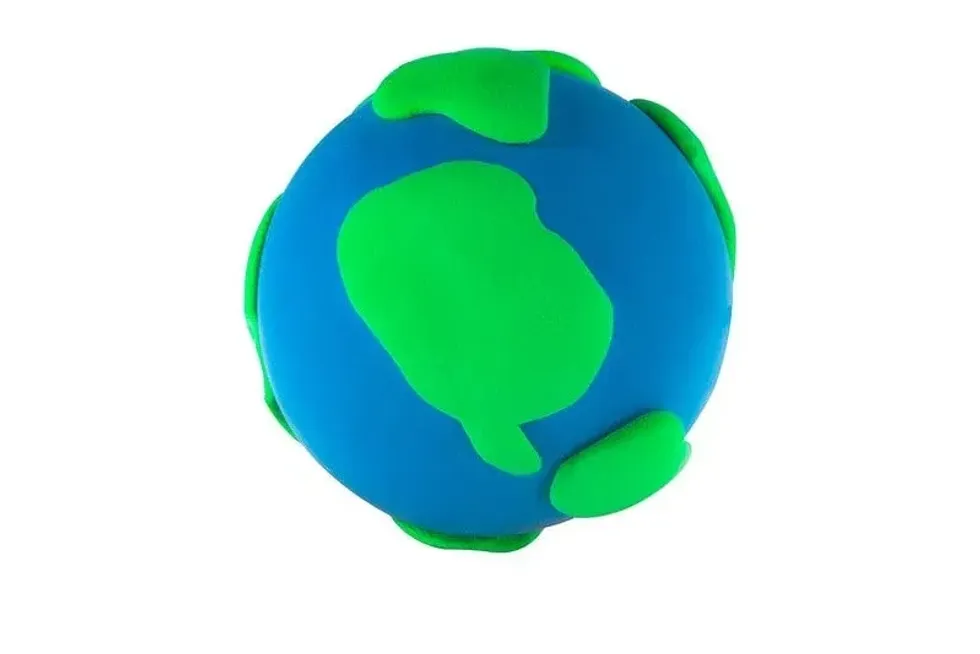
Image © iStock.
It's time to journey to the centre of the Earth...
OK, so it's not quite that adventurous but we do have some fun project ideas to help the kids learn about the layers of the Earth. Luckily with zero digging involved.
KS2 is when children's geography lessons start to focus on Earth science: the way our planet is structured, and what it's made up of.
We have some fun projects to aid with learning about the Earth's layers, that are also interesting and enjoyable enough that hopefully, it won't feel too much like homework.
In the interest of keeping the Earth as beautiful as we can for as long as we can, we have tried to be eco-conscious and stick to using only items that you might already have at home, or could have waiting in the recycling bin.

Image © iStock
What Are The Layers Of The Earth Called?
1. The core.
2. The mantle.
3. The crust.
These are the three main layers of the Earth. Each of these layers can then be divided into two parts, called the inner and outer core, the upper and lower mantle, and the continental and oceanic crust.
Earth Model Science Projects To Try At Home
Image © iStock
Modelling Clay Earth
This is one of the easiest and most effective ways to show the layers of the Earth - not to mention very satisfying!
You Will Need:
Seven different colours of modelling clay, salt dough or play dough.
Dental floss (waxed is best).
Method:
1. Make a small ball to represent the inner core- a 'hot' colour like red or orange would be perfect.
2. Next, choose a colour for the outer core, roll out a circle and gently wrap this around the inner core and roll it slightly so it will stick.
3. You now need to choose three more colours to represent the lower mantle, upper mantle and the crust. Each colour will need a little more clay to form a bigger circle than the last. To finish off you could do one last layer of mixed green and blue.
4. Once all the layers are ready and you have a round clay ball, take a piece of the dental floss and pull through, this will reveal all the layers.
Papier Mache Earth Bowl
This fun project does require a bit of patience as it takes a while to dry, but the end result is worth the wait.
You Will Need:
A glass bowl.
Newspaper cut into thin strips.
Tin foil.
Water.
Flour.
Cooking oil.
Paintbrushes.
Acrylic paint.
Method:
1. Mix one mugful of flour with two of water to make the papier mache paste. Stir the mixture until you reach a thin, smooth consistency.
2. Take your upside down glass bowl and cover the outside with the tin foil. Create texture by crumpling up the foil a bit. Rub a little of the oil on the foil, this makes it much easier to remove your earth bowl once it's dry.
3. Take your newspaper strips and dip into the paste, gently squeeze the strips so they aren't too wet and lay over the bowl. Cover the whole bowl, overlapping the strips in different directions.
4. Time to let the bowl dry, if you can it is best to let it dry over night. Once totally dry you can carefully remove the papier mache bowl and gently peel the foil away,
5. Finally, time to paint! You can paint the inside of the bowl as the inside of the earth, with the inner core at the centre, followed by the outer core, the upper and lower mantle, and then the crust. Then flip the bowl over and use blue, green and white paint for the sea, land and ice caps.
Recycled Earth Collage
This is a great way to reuse any magazines you might have at home. Gardening ones are especially good colour wise, but anything will work, craft supplies like coloured tissue paper and torn up card are also very effective.
You Will Need:
Collage materials in various textures/colours, ripped up.
A pencil.
Scissors.
A piece of paper or card as a base.
Glue stick.
Method:
1. Start by drawing your circles on the paper first so you have a guide to follow, or go rogue- abstract looks great too, and the earth isn't a perfect circle anyway.
2. Starting with the core, create a circle by layering and overlapping your materials, go on to make the other layers of the earth fanning out from the centre, for the final layer you could use blue and green tissue paper to represent how the earth looks 'from the outside'.
3. Label your layers in scientific fashion by drawing a line out from the centre and writing the name of the layer alongside it.
Lego To The Centre Of The Earth

Image © Unsplash
This is a wonderful way to learn about the layers of the earth with an activity lots of kids are already very familiar with.
You Will Need:
Lego in various different colours.
Method:
1. There are all sorts of ways you can build this model with Lego, so once the kids know what the layers of the earth are and the order they go in, it could be a fun challenge to see what they can come up with.
2. You could make a 'slice' of the earth showing all the layers, so starting on the bottom with a white brick for the ice cap, then blue and green around the edge, leading to other colours as the layers get towards the centre where you could use red or orange for the core.
3. You could also build it as a 3D model such as a tower, or in any shape just making sure the layers are in the correct order, either building towards the core then back out again, or starting with the core at the bottom of the model and working your way up to show the crust.
Earth In A Bottle
For this idea you could also use different colour schemes than the traditional colours for the layers of the earth, this could then make a pretty ornament too.
You Will Need:
A container with a lid, a plastic or glass bottle works well for this or a glass jar.
5 cups of sand.
Paint powder or food dye.
Method:
1. Firstly you will need to dye your sand, you can do this by dividing up the sand into five bowls, then add either a small amount of paint powder or a few drops of food colouring, then mix it up.
2. Choose your first colour, this will represent the crust on the 'bottom' of the earth, imaging you are looking at a cross section of the layers, so the bottom and top layer will be the same.
3. Next you will need different colours for the upper mantle, lower mantle, outer core and inner core. Once you have added the first layer, go back through the layers the other way, ending on a final layer of the crust colour.
4. If you are going to keep your earth project or if it will need to travel, you might want to glue the lid on, just in case.
Cookies With A Continental Crust
Another tasty science project! These biscuits should help the kids to memorise the layers of the earth, and they also go well with a cup of tea.
You Will Need:
A packet of plain biscuits, Rich Teas or Digestives work well.
Small tubes of icing, or you can make your own.
Method:
1. Take your biscuit and recreate the layers of earth with the icing, using different colours for each layer.
2. To add texture and make it even more fun you could use various decorations like sprinkles or silver balls to add to each layer, don't forget to talk about each one as you go along- so the kids aren't totally distracted by all the sugar!
Earthy Homemade Pizza

Image © iStock
Another delicious way to tie learning about the layers of the earth in with the added bonus of making dinner.
You Will Need:
Plain pizza bases (or you could make them from scratch).
Tomato pizza sauce.
Cheese.
Toppings of your choice - one for each layer.
Method:
1. Start by covering your pizza base with tomato sauce, then a layer of cheese.
2. Next up, time to add a different topping for each of the layers. How about something hot and spicy for the inner core, followed by a range of flavours for everything else, you could use different types of cheese, pineapple (controversial), olives, roasted vegetables- the options are endless.
3. Arrange the toppings in circles from the centre outwards, just like the earth diagrams.
4. Pop your pizza in the oven, bake, and enjoy!
Top Tip: If this is a project for school and not just for fun, don't forget to document with photos before it's all eaten up.
Artistic Natural Earth Collage
This layers of the earth project is inspired by artist Andy Goldsworthy, check out some of his amazing natural collages to get an idea of what we are going for.
You Will Need:
The great outdoors!
A bucket or tub to collect materials in.
Method:
1. Gather your materials, this is a fun activity to do while out on a walk as you can search for different items, for example, one colour of leaf for the core, another for the mantle, and perhaps rocks for the crust and so on.
2. When you have enough pieces, you need to find an outdoor space where you can assemble your layers of earth.
3. Starting with the core, arrange the natural items you've found into a circle.
4. Continue to recreate the science diagram until you have made a giant natural collage!
Top Tip: Don't forget to take photographs to document this project, as it is totally natural you don't have to worry about dismantling it, it can be left for others to spot while out and about too.
An Eggcellent Eggsample Of Earth Layers
This is a really simple way to demonstrate the basic three earth layers, this quick experiment is best suited to children in the younger year groups of middle school, though make sure they are supervised at all times around the sharp knife.
You Will Need:
A hard boiled egg (use your preferred method, it just needs to be hard boiled not soft).
A sharp knife.
Method:
1. Take your hard boiled egg and carefully slice it in half.
2. You can now see three defined layers, the shell represents the earth's crust, the egg white is the mantle and the yolk is the core!
3. If the shell cracked when you were cutting it in half, the cracks could represent tectonic plates, these are the large sections of the earth's crust that shift and move over time and during earthquakes.
Stylish And Scientific Planter Project

Image © Unsplash
Indoor plants are super on trend at the moment, so this is a cool way to have a science project on display that the kids can not only learn from- but looks great too.
You Will Need:
A clear vase or jar.
Materials to layer up, gravel, small pebbles, soil, sand.
A plant, a small succulent would work well.
Method:
1. Layer up your materials in the jar, starting with some pebbles on the bottom, this will help with drainage, followed by sand, then soil, as you add each handful you can talk about which layers of the earth they represent.
2. You can now add your plant into the soil, and finish your model off by scattering some gravel or small pebbles around the base of the plant, to further aid with drainage and also create a realistic representation of the earth's crust.
Disclaimer
Here at Kidadl, we love trying science experiments at home with our kids. However, we recognise that not all science ideas are appropriate and suitable for all children and families or in all circumstances.
Therefore we recommend that these ideas are used as inspiration, that ideas are undertaken with appropriate adult supervision, and that each adult uses their own knowledge of their children to consider the suitability of each project.


We Want Your Photos!
More for You


See All
Bachelor of Arts specializing in Fashion/Apparel Design
Amy LinesBachelor of Arts specializing in Fashion/Apparel Design
With a degree in Fashion Design from Falmouth University, Amy has a passion for textiles, tiles, art, ceramics, and houseplants which she enjoys filling her beautiful home in Hampshire with. She also has a keen interest in infant and child sleep patterns and mindfulness for adults and children, inspired by her energetic and chatty three-year-old daughter. When not exploring the outdoors, Amy can be found painting, knitting, and dancing at home.
Disclaimer
1) Kidadl is independent and to make our service free to you the reader we are supported by advertising. We hope you love our recommendations for products and services! What we suggest is selected independently by the Kidadl team. If you purchase using the Buy Now button we may earn a small commission. This does not influence our choices. Prices are correct and items are available at the time the article was published but we cannot guarantee that on the time of reading. Please note that Kidadl is a participant in the Amazon Services LLC Associates Program, an affiliate advertising program designed to provide a means for sites to earn advertising fees by advertising and linking to Amazon. We also link to other websites, but are not responsible for their content.
2) At Kidadl, we strive to recommend the very best activities and events. We will always aim to give you accurate information at the date of publication - however, information does change, so it’s important you do your own research, double-check and make the decision that is right for your family. We recognise that not all activities and ideas are appropriate for all children and families or in all circumstances. Our recommended activities are based on age but these are a guide. We recommend that these ideas are used as inspiration, that ideas are undertaken with appropriate adult supervision, and that each adult uses their own discretion and knowledge of their children to consider the safety and suitability. Kidadl cannot accept liability for the execution of these ideas, and parental supervision is advised at all times, as safety is paramount. Anyone using the information provided by Kidadl does so at their own risk and we can not accept liability if things go wrong.
3) Because we are an educational resource, we have quotes and facts about a range of historical and modern figures. We do not endorse the actions of or rhetoric of all the people included in these collections, but we think they are important for growing minds to learn about under the guidance of parents or guardians.