How To Make A Fortnite Cake That Kids And Teens Will Love


Gallery
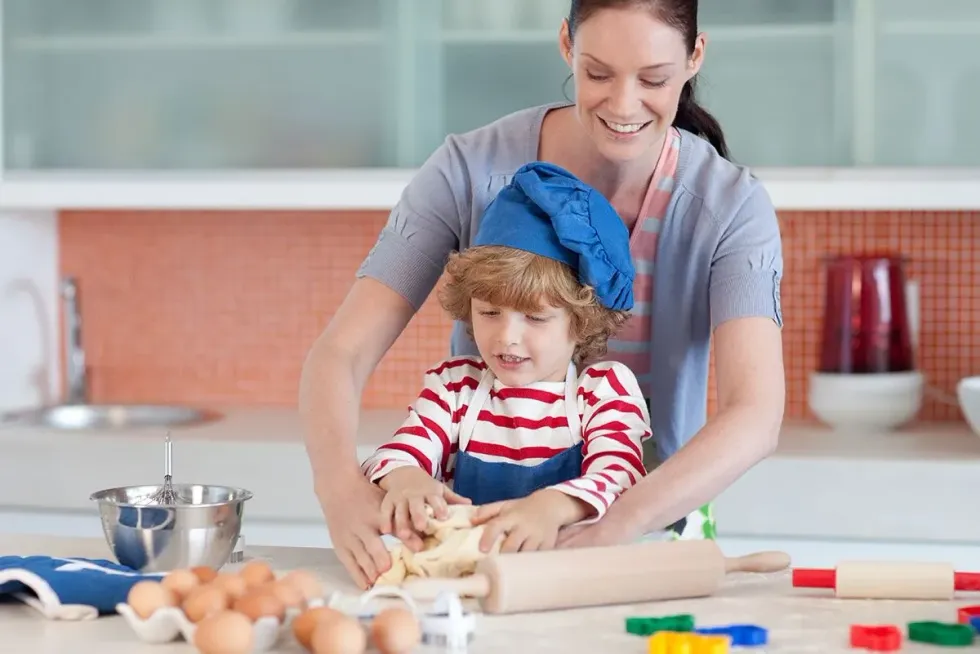
Do you have a Fortnite-addicted youngster in the house?
You're sure to chock up some cool points by baking a Fortnite birthday cake. Below we've got some Fortnite birthday cake ideas of varying difficulty for you to make.
Fortnite is a wildly popular video game that was released in 2017. Players work together or compete to fight zombies, scavenge food or equipment, and complete missions. There are three games: Fortnite: Save the World, Fortnite Battle Royale, and Fortnite Creative. It's so popular because of its detailed universes, excellent graphics/gameplay, and multiplayer element.
You could also get children from ages 10 to 18 involved with any of these recipes, especially if they know the game well and can give you tips on the design. Why not treat them to some hilarious video game jokes and get involved in some great app-based games afterwards?
Ingredients
Basic Ingredients:
225g self-raising flour, 225 g caster sugar, 225g room-temperature unsalted butter, 2 tsp baking powder, 4 eggs, 6 drops vanilla extract, 2 tsp milk, buttercream.
Toppings:
Ready-to-roll fondant icing in various colours, buttercream, cake toppers.

Equipment
A large mixing bowl, cake tins, rolling pin, sharp knife, parchment paper.
Easy Fortnite Cake Tutorial
1) Preheat your oven to 160C/140C fan and line two round cake tins with parchment paper.
2) Bake a vanilla or chocolate sponge cake, using the 'basic ingredients' above. Start by sifting the flour and baking powder into a large mixing bowl. Mix in all the other ingredients one at a time until fully combined.
3) Divide the mix between two cake tins and bake for 30 to 35 minutes, or until a skewer comes out clean.
4) Allow to cool for 10 minutes, transfer to a wire rack and cool for another 10 minutes.
5) Use a knife to flatten the tops of both sponges, as they have likely risen in the middle. Spread homemade or store-bought buttercream on top of both cakes, as well as along the sides, creating even layers.
6) Place one cake on top of the other.
7) Roll out ready-to-roll green icing. Gently place it completely over your two-layer cake, using a knife to cut off any excess and using your hands to smooth the top and around the sides.
8) Buy or make green buttercream (to make, beat 600g sifted icing sugar and 300g butter together with green food colouring and 2-3 tablespoons of boiling water) and add it to a piping bag. Pipe blobs of green buttercream all over the top of the cake, to create a grassy effect.
9) We did say this was an easy cake. And the easiest way to complete the Fortnite look is to buy a selection of Fortnite cake decorations/Fortnite cake toppers (there are tonnes available online) and place them artfully around your grass.

Fortnite Battle Bus Cake Tutorial
The Fortnite Battle Bus is an iconic part of the series, dropping players off as they begin their missions. This is a slightly trickier Fortnite cake to make, requiring a lot of ready-to-roll icing.
1) Search for a picture of the Battle Bus so you know exactly what you're trying to recreate. The main features you want to create are the blue bus, the black windows and doors, the yellow pipe along the front, the red and yellow lights on the front, and the white and blue balloon on the top.
2) Bake a vanilla or chocolate sponge cake, per the above recipe, but use rectangular cake tins.
3) Roll out a large piece of blue fondant icing and cover your rectangular, two-layer cake in it.
4) Now's the time to consult your picture, and prepare rolled-out sheets of icing in the colours you need. Use a sharp knife to cut them into the relevant sizes, and brush with a small bit of water to stick onto the blue bus.
5) The biggest challenge will be the balloon; in the game, this would be hovering above the bus, but since this would be exceedingly difficult on a cake, we suggest moulding a chunk of white icing and placing it on top of a black square of icing. Use toothpicks to keep in place if needed.
Fortnite Llama Cake
Llama Pinatas are the "loot boxes" in Fortnite. This cake is perhaps the hardest Fortnite cake ideas to make, but will be very rewarding when complete!
1) Bake two sponge cakes, per the recipes above, in square tins. Create a two-layer sponge with buttercream in the middle.
2) Print out a Fortnite llama template. You can search for these online, but you need to make sure the size you print roughly corresponds to the size you want your cake to be (it can be slightly larger as you will be cutting out your cake in pieces).
3) Cut your printed paper to shape, and then place on top of the two-layer cake. Use a sharp knife to cut around the shape. Since there will be excess, you can do the head and body separately and connect them after.
4) Position your llama's head and body so they fit together and cover the entire cake in buttercream. Chill in fridge for 25 mins, then add another layer of buttercream.
5) Roll out purple, dark blue and light blue fondant icing, and cut numerous strips that you can layer over each other to create a Pinata effect all over the cake.
6) Roll out white, brown, black and grey fondant and cut them to shape to place on the cake, adding eyes and an arrow on the side.
Good To Know
It will take at least two and a half hours to prep your ingredients, bake the cake, let it cool, decorate and clear up. It should serve 12 slices.
Kids of any age can enjoy eating these birthday cakes!
The Fortnite cakes sponge recipe is simple, so swapping ingredients for a gluten free or dairy free option is very easy. There are many alternatives available so you can use whichever you like. For cake decorating, you can buy vegan buttercream.
If you're making the cake a few days ahead of time, an iced cake will be fine at room temperature for three days as long as you cover it an overturned Tupperware/bowl. For more than 3 days, place it in the fridge for 15 minutes, then cover it with plastic wrap.
Before serving, let it adjust to room temperature for 30 minutes.
If you want to freeze any of these cakes, it's best to freeze the undecorated layers and do the decorating closer to the time.


We Want Your Photos!
More for You


See All
Bachelor of Arts specializing in French with Film Studies, Bachelor of Arts (Year Abroad) specializing in Literature, History, Language, Media, and Art
Georgia StoneBachelor of Arts specializing in French with Film Studies, Bachelor of Arts (Year Abroad) specializing in Literature, History, Language, Media, and Art
Georgia is an experienced Content Manager with a degree in French and Film Studies from King's College London and Bachelors degree from Université Paris-Sorbonne. Her passion for exploring the world and experiencing different cultures was sparked during her childhood in Switzerland and her year abroad in Paris. In her spare time, Georgia enjoys using London's excellent travel connections to explore further afield.
Disclaimer
1) Kidadl is independent and to make our service free to you the reader we are supported by advertising. We hope you love our recommendations for products and services! What we suggest is selected independently by the Kidadl team. If you purchase using the Buy Now button we may earn a small commission. This does not influence our choices. Prices are correct and items are available at the time the article was published but we cannot guarantee that on the time of reading. Please note that Kidadl is a participant in the Amazon Services LLC Associates Program, an affiliate advertising program designed to provide a means for sites to earn advertising fees by advertising and linking to Amazon. We also link to other websites, but are not responsible for their content.
2) At Kidadl, we strive to recommend the very best activities and events. We will always aim to give you accurate information at the date of publication - however, information does change, so it’s important you do your own research, double-check and make the decision that is right for your family. We recognise that not all activities and ideas are appropriate for all children and families or in all circumstances. Our recommended activities are based on age but these are a guide. We recommend that these ideas are used as inspiration, that ideas are undertaken with appropriate adult supervision, and that each adult uses their own discretion and knowledge of their children to consider the safety and suitability. Kidadl cannot accept liability for the execution of these ideas, and parental supervision is advised at all times, as safety is paramount. Anyone using the information provided by Kidadl does so at their own risk and we can not accept liability if things go wrong.
3) Because we are an educational resource, we have quotes and facts about a range of historical and modern figures. We do not endorse the actions of or rhetoric of all the people included in these collections, but we think they are important for growing minds to learn about under the guidance of parents or guardians.