15 Easy Sewing Projects For Kids


Gallery
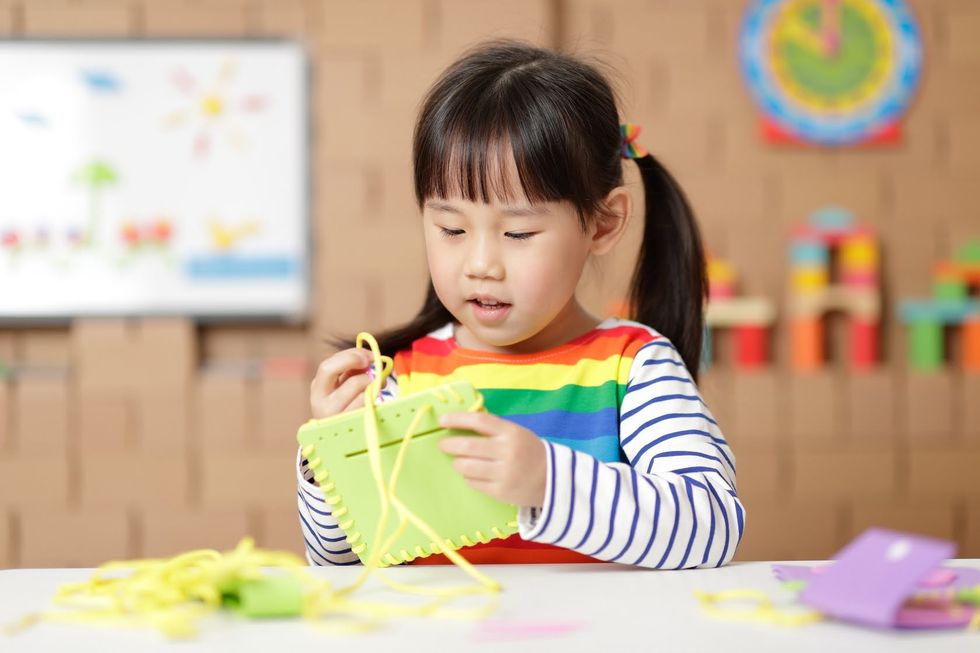
Sewing is considered a great life skill for any child to learn, everyone would benefit from knowing how to attach a button or repair any tear, and it might be the start of something even bigger.
Not a long time ago, it was common for kids to learn the spectacular art of sewing.
When the clothes were made by hand, and hats and mittens were usually a living room project, it typically made sense that children would learn to provide these items for themselves as they grew up.
While your children might not need to create their own wardrobes or something like that but there are still several real benefits to investing your time and resources into introducing your children to the art of basic sewing.
Kids often have problems when they have to do some precise work with their own hands. This is usually normal when they are small, it might be left untreated, and they might become very rough with their hand coordination which could cause them difficulties when they are writing, playing, or using some kind of tools.
If they start sewing, these issues can be avoided altogether.
Since it requires delicate and precise hand movements, sewing helps them to develop fine motor skills suitably. If you want your child to have a hobby that will have a positive impact on their character development and mental growth, consider teaching them how to sew.
5 Points To Help You Choose A Sewing Project
- Start with a basic project for kids to sew and add new skills to each project.
- Select quick projects that can be completed in 1 sewing session.
- Think about what your child might actually use in daily life.
- Let your kids get involved more in selecting projects. Let them pick the fabrics and colors. The more work they do, the more they will enjoy it.
- Let them customize their own project, so it feels like their own.
East Fat Quarter Drawstring Bag
These bags are quick and super easy to make. Kids can carry their art and craft materials or other lightweight materials in a bag made by themselves.
Things You'll Need
- One fat quarter.
- 25″ of ribbon.
Steps To Follow
- You can start by trimming any selvage edges off the fat quarter. Fold down the top edge about ½″, press, and sew in place. It's totally okay if it is not exact.
- Then fold the fat quarter in half width-wise with right-sides-together. Sew the bottom and side edges together using a ⅜″ seam allowance. Stop and backstitch roughly 4″ from the top.
- Press side seam allowance open, including the 4″ portion not sewn together. Be careful and sew those edges down, starting at the top of one side, pivoting roughly about ¼″ beneath the opening and backstitching once, then up the other side.
- Fold the top edge down 2″ and pin it in place. Sew the flap down to create your casing.
- You may then stitch the top edge of the bag about ¼″ away from the edge to give it more of a finished look.
- You can also add a boxed bottom to give my bag a little more shape. This is purely optional. But it is super easy if you want to do it.
- Sew right on the drawn line and trim excess fabric ¼″ away from the seam. Repeat the same with the other corner.
- Turn the bag right side out. Then put a safety pin at one end of your ribbon to help you thread it through your casing.
- Then simply tie the ends of the ribbon in a knot. And you are done.
Tooth Fairy Pillow
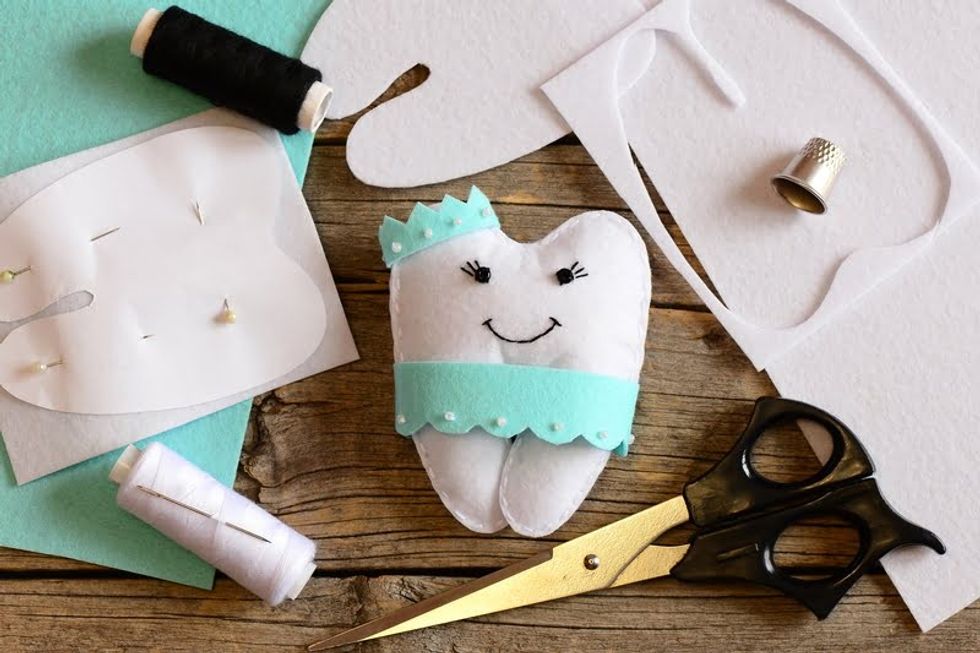
An Amazing sewing project with very easy steps. It is an elegant pillow with a tooth fairy crafted upon it. Every kid today has heard about the tooth fairy, so why not as well sew it onto your kids' favorite pillow?
Things You'll Need
- Card stock
- Scissors
- White felt
- White thread
- Sewing machine
- Loose batting
- Tooth Template
- Black embroidery floss
- 1/4 yard soft fabric (Martha used a 100 percent cotton flannel in light blue)
- Embroidery hoop
- Pins
- Water-soluble marking pen
- Embroidery needle
Steps To Follow
- Print a tooth template on card stock and cut out the shape.
- Trace that shape onto white felt with a water-soluble marking pen, and cut the shape from felt.
- Embroider the face onto the tooth with black embroidery floss. The eyes are French knots, and the mouth is created with a backstitch.
- Cut two pieces of a 9-by-9-inch fabric. Hoop one piece of fabric into an embroidery hoop, and pin tooth in the center.
- Hand-stitch around the edge of the tooth with white thread, leaving the top open, so the tooth becomes a pocket.
- Remove fabric from the hoop and place appliqued side down on the other square of fabric. Pin in place. Sew pieces together around the edges with a 1/4-inch seam allowance, leaving a 4-inch opening for turning the right side out.
- Then trim the corners of the seam allowance and turn the right side out. Stuff with batting and hand-stitch opening closed.
Cute Felt Monsters
Things You'll Need
- One fat quarter.
- 25″ of ribbon.
Steps To Follow
- You can start by trimming any selvage edges off the fat quarter. Fold down the top edge about ½″, press, and sew in place. It's totally okay if it is not exact.
- Then fold the fat quarter in half width-wise with right-sides-together. Sew the bottom and side edges together using a ⅜″ seam allowance. Stop and backstitch roughly 4″ from the top.
- Press side seam allowance open, including the 4″ portion not sewn together. Be careful and sew those edges down, starting at the top of one side, pivoting roughly about ¼″ beneath the opening and backstitching once, then up the other side.
- Fold the top edge down 2″ and pin it in place. Sew the flap down to create your casing.
- You may then stitch the top edge of the bag about ¼″ away from the edge to give it more of a finished look.
- You can also add a boxed bottom to give my bag a little more shape. This is purely optional. But it is super easy if you want to do it.
- Sew right on the drawn line and trim excess fabric ¼″ away from the seam. Repeat the same with the other corner.
- Turn the bag right side out. Then put a safety pin at one end of your ribbon to help you thread it through your casing.
- Then simply tie the ends of the ribbon in a knot. And you are done.
Tooth Fairy Pillow
An Amazing sewing project with very easy steps. It is an elegant pillow with a tooth fairy crafted upon it. Every kid today has heard about the tooth fairy, so why not as well sew it onto your kids' favorite pillow?
Things You'll Need
- Card stock
- Scissors
- White felt
- White thread
- Sewing machine
- Loose batting
- Tooth Template
- Black embroidery floss
- 1/4 yard soft fabric (Martha used a 100 percent cotton flannel in light blue)
- Embroidery hoop
- Pins
- Water-soluble marking pen
- Embroidery needle
Steps To Follow
- Print a tooth template on card stock and cut out the shape.
- Trace that shape onto white felt with a water-soluble marking pen, and cut the shape from felt.
- Embroider the face onto the tooth with black embroidery floss. The eyes are French knots, and the mouth is created with a backstitch.
- Cut two pieces of a 9-by-9-inch fabric. Hoop one piece of fabric into an embroidery hoop, and pin tooth in the center.
- Hand-stitch around the edge of the tooth with white thread, leaving the top open, so the tooth becomes a pocket.
- Remove fabric from the hoop and place appliqued side down on the other square of fabric. Pin in place. Sew pieces together around the edges with a 1/4-inch seam allowance, leaving a 4-inch opening for turning the right side out.
- Then trim the corners of the seam allowance and turn the right side out. Stuff with batting and hand-stitch opening closed.
Cute Felt Monsters
The cute felt monsters are a great way to teach your kids to sew. They are the perfect beginner sewing project. You can easily create a combination of different monsters, which could be a perfect lineup and look amazing.
Things You'll Need
- Different colors of felt fabric.
- A cut-out monster template designed by your child.
- Different cut-outs from the felt for different looks (for example, eyes, a smile, and more)
- Stuffing Material
Steps To Follow
- Trace the drawing onto the felt and cut out two pieces of the same size.
- Trace and cut accessories.
- Sew the accessories onto the body using matching thread.
- Place the body with accessories onto the other body piece and pin it.
- Sew around the edges but leave one opening.
- Stuff the bodies through the opening using small amounts of stuffing at a time.
- Use some sharp object such as a pencil to push the stuffing into the arms and legs.
- Stuff it full and then sew the opening and backstitching to secure.
Superhero Mask Pattern
Things You'll Need
- One fat quarter.
- 25″ of ribbon.
Steps To Follow
- You can start by trimming any selvage edges off the fat quarter. Fold down the top edge about ½″, press, and sew in place. It's totally okay if it is not exact.
- Then fold the fat quarter in half width-wise with right-sides-together. Sew the bottom and side edges together using a ⅜″ seam allowance. Stop and backstitch roughly 4″ from the top.
- Press side seam allowance open, including the 4″ portion not sewn together. Be careful and sew those edges down, starting at the top of one side, pivoting roughly about ¼″ beneath the opening and backstitching once, then up the other side.
- Fold the top edge down 2″ and pin it in place. Sew the flap down to create your casing.
- You may then stitch the top edge of the bag about ¼″ away from the edge to give it more of a finished look.
- You can also add a boxed bottom to give my bag a little more shape. This is purely optional. But it is super easy if you want to do it.
- Sew right on the drawn line and trim excess fabric ¼″ away from the seam. Repeat the same with the other corner.
- Turn the bag right side out. Then put a safety pin at one end of your ribbon to help you thread it through your casing.
- Then simply tie the ends of the ribbon in a knot. And you are done.
Tooth Fairy Pillow
An Amazing sewing project with very easy steps. It is an elegant pillow with a tooth fairy crafted upon it. Every kid today has heard about the tooth fairy, so why not as well sew it onto your kids' favorite pillow?
Things You'll Need
- Card stock
- Scissors
- White felt
- White thread
- Sewing machine
- Loose batting
- Tooth Template
- Black embroidery floss
- 1/4 yard soft fabric (Martha used a 100 percent cotton flannel in light blue)
- Embroidery hoop
- Pins
- Water-soluble marking pen
- Embroidery needle
Steps To Follow
- Print a tooth template on card stock and cut out the shape.
- Trace that shape onto white felt with a water-soluble marking pen, and cut the shape from felt.
- Embroider the face onto the tooth with black embroidery floss. The eyes are French knots, and the mouth is created with a backstitch.
- Cut two pieces of a 9-by-9-inch fabric. Hoop one piece of fabric into an embroidery hoop, and pin tooth in the center.
- Hand-stitch around the edge of the tooth with white thread, leaving the top open, so the tooth becomes a pocket.
- Remove fabric from the hoop and place appliqued side down on the other square of fabric. Pin in place. Sew pieces together around the edges with a 1/4-inch seam allowance, leaving a 4-inch opening for turning the right side out.
- Then trim the corners of the seam allowance and turn the right side out. Stuff with batting and hand-stitch opening closed.
Cute Felt Monsters
The cute felt monsters are a great way to teach your kids to sew. They are the perfect beginner sewing project. You can easily create a combination of different monsters, which could be a perfect lineup and look amazing.
Things You'll Need
- Different colors of felt fabric.
- A cut-out monster template designed by your child.
- Different cut-outs from the felt for different looks (for example, eyes, a smile, and more)
- Stuffing Material
Steps To Follow
- Trace the drawing onto the felt and cut out two pieces of the same size.
- Trace and cut accessories.
- Sew the accessories onto the body using matching thread.
- Place the body with accessories onto the other body piece and pin it.
- Sew around the edges but leave one opening.
- Stuff the bodies through the opening using small amounts of stuffing at a time.
- Use some sharp object such as a pencil to push the stuffing into the arms and legs.
- Stuff it full and then sew the opening and backstitching to secure.
Superhero Mask Pattern
Who doesn't like superheroes? Yeah, everyone does! Children are obsessed with their favorite superheroes. It is a sewing project that your kids would largely love and likely engage them in a productive activity.
Things You'll Need
- A small amount of two colours of fabric (or you can simply use the same color on the front and the back).
- One package double wide folded bias tape in a coordinating color.
- One piece of elastic (about 1 foot long).
Step To Follow
- First, print out your pattern pieces.
- Cut one piece of fabric from the large pattern piece and two from the smaller one. They can either be of the same color or different. It is totally up to you.
- Trace the eye holes with a washable marker or chalk. Then also, trace a dotted line on the smaller pieces.
- Pin the two smaller pieces on the large piece matching up the edges.
- Sew around the eye holes about 1/4 in. outside the markings.
- Using a nice and sharp scissor, cut out the eye holes taking the help of markings.
- Then, pull the small pieces through the eye holes and press them smoothly.
- Fold the front side of the mask in half and pull the two ends of the small pieces around the back so you can sew them together on the dotted line you made before. Make sure you have the right sides together while doing this.
- Now, turn it so that it is all right side out and press it flat.
- Using your bias tape, pin it around the mask and sew it in place.
- To make the elastic band around the head, cut a piece of fabric about 22 in. by 2-3 in. and sew it together the long way.
- Insert your elastic (about 12 in.) into the casing you just made and pull it through, ensure to sew it in place on the starting end, and then pull the fabric down around the elastic and sew it on the other end.
Pencil Case Using Felt
Things You'll Need
- One fat quarter.
- 25″ of ribbon.
Steps To Follow
- You can start by trimming any selvage edges off the fat quarter. Fold down the top edge about ½″, press, and sew in place. It's totally okay if it is not exact.
- Then fold the fat quarter in half width-wise with right-sides-together. Sew the bottom and side edges together using a ⅜″ seam allowance. Stop and backstitch roughly 4″ from the top.
- Press side seam allowance open, including the 4″ portion not sewn together. Be careful and sew those edges down, starting at the top of one side, pivoting roughly about ¼″ beneath the opening and backstitching once, then up the other side.
- Fold the top edge down 2″ and pin it in place. Sew the flap down to create your casing.
- You may then stitch the top edge of the bag about ¼″ away from the edge to give it more of a finished look.
- You can also add a boxed bottom to give my bag a little more shape. This is purely optional. But it is super easy if you want to do it.
- Sew right on the drawn line and trim excess fabric ¼″ away from the seam. Repeat the same with the other corner.
- Turn the bag right side out. Then put a safety pin at one end of your ribbon to help you thread it through your casing.
- Then simply tie the ends of the ribbon in a knot. And you are done.
Tooth Fairy Pillow
An Amazing sewing project with very easy steps. It is an elegant pillow with a tooth fairy crafted upon it. Every kid today has heard about the tooth fairy, so why not as well sew it onto your kids' favorite pillow?
Things You'll Need
- Card stock
- Scissors
- White felt
- White thread
- Sewing machine
- Loose batting
- Tooth Template
- Black embroidery floss
- 1/4 yard soft fabric (Martha used a 100 percent cotton flannel in light blue)
- Embroidery hoop
- Pins
- Water-soluble marking pen
- Embroidery needle
Steps To Follow
- Print a tooth template on card stock and cut out the shape.
- Trace that shape onto white felt with a water-soluble marking pen, and cut the shape from felt.
- Embroider the face onto the tooth with black embroidery floss. The eyes are French knots, and the mouth is created with a backstitch.
- Cut two pieces of a 9-by-9-inch fabric. Hoop one piece of fabric into an embroidery hoop, and pin tooth in the center.
- Hand-stitch around the edge of the tooth with white thread, leaving the top open, so the tooth becomes a pocket.
- Remove fabric from the hoop and place appliqued side down on the other square of fabric. Pin in place. Sew pieces together around the edges with a 1/4-inch seam allowance, leaving a 4-inch opening for turning the right side out.
- Then trim the corners of the seam allowance and turn the right side out. Stuff with batting and hand-stitch opening closed.
Cute Felt Monsters
The cute felt monsters are a great way to teach your kids to sew. They are the perfect beginner sewing project. You can easily create a combination of different monsters, which could be a perfect lineup and look amazing.
Things You'll Need
- Different colors of felt fabric.
- A cut-out monster template designed by your child.
- Different cut-outs from the felt for different looks (for example, eyes, a smile, and more)
- Stuffing Material
Steps To Follow
- Trace the drawing onto the felt and cut out two pieces of the same size.
- Trace and cut accessories.
- Sew the accessories onto the body using matching thread.
- Place the body with accessories onto the other body piece and pin it.
- Sew around the edges but leave one opening.
- Stuff the bodies through the opening using small amounts of stuffing at a time.
- Use some sharp object such as a pencil to push the stuffing into the arms and legs.
- Stuff it full and then sew the opening and backstitching to secure.
Superhero Mask Pattern
Who doesn't like superheroes? Yeah, everyone does! Children are obsessed with their favorite superheroes. It is a sewing project that your kids would largely love and likely engage them in a productive activity.
Things You'll Need
- A small amount of two colours of fabric (or you can simply use the same color on the front and the back).
- One package double wide folded bias tape in a coordinating color.
- One piece of elastic (about 1 foot long).
Step To Follow
- First, print out your pattern pieces.
- Cut one piece of fabric from the large pattern piece and two from the smaller one. They can either be of the same color or different. It is totally up to you.
- Trace the eye holes with a washable marker or chalk. Then also, trace a dotted line on the smaller pieces.
- Pin the two smaller pieces on the large piece matching up the edges.
- Sew around the eye holes about 1/4 in. outside the markings.
- Using a nice and sharp scissor, cut out the eye holes taking the help of markings.
- Then, pull the small pieces through the eye holes and press them smoothly.
- Fold the front side of the mask in half and pull the two ends of the small pieces around the back so you can sew them together on the dotted line you made before. Make sure you have the right sides together while doing this.
- Now, turn it so that it is all right side out and press it flat.
- Using your bias tape, pin it around the mask and sew it in place.
- To make the elastic band around the head, cut a piece of fabric about 22 in. by 2-3 in. and sew it together the long way.
- Insert your elastic (about 12 in.) into the casing you just made and pull it through, ensure to sew it in place on the starting end, and then pull the fabric down around the elastic and sew it on the other end.
Pencil Case Using Felt
It is surprisingly very easy to make a pencil case from felt. It does involve sewing, but it is so simple that you don’t even have to have a sewing machine.
Things You'll Need
- Felt
- Needle and thread
- Scissors
- Ribbon
- Buttons
- Sewing machine (optional)
Steps To Follow
- Begin by simply cutting your felt sheets to fit. You can use a number of pencils that you want to fit, which would give you an approximate size.
- Cut two felt sheets of a certain size but remember one being somewhat smaller than the longer one.
- Use the needle and thread to tie a button to the pencil case just beneath the opening.
- You can either cut a small opening in the flap for a buttonhole for closure or add a ribbon onto the flap that can loop or wrap around the button. Or you can simply do some of both options.
- Once your Pencil Case is constructed, you can get very much creative with decorating it.
- You can add more buttons just for decoration, fabric paint, sequins, and much more embellishments that your kid likes. Let your kids choose.
- Once you have made a few pencil cases, you could make matching notebooks or book covers too.
Fabric Bookmarks
Things You'll Need
- One fat quarter.
- 25″ of ribbon.
Steps To Follow
- You can start by trimming any selvage edges off the fat quarter. Fold down the top edge about ½″, press, and sew in place. It's totally okay if it is not exact.
- Then fold the fat quarter in half width-wise with right-sides-together. Sew the bottom and side edges together using a ⅜″ seam allowance. Stop and backstitch roughly 4″ from the top.
- Press side seam allowance open, including the 4″ portion not sewn together. Be careful and sew those edges down, starting at the top of one side, pivoting roughly about ¼″ beneath the opening and backstitching once, then up the other side.
- Fold the top edge down 2″ and pin it in place. Sew the flap down to create your casing.
- You may then stitch the top edge of the bag about ¼″ away from the edge to give it more of a finished look.
- You can also add a boxed bottom to give my bag a little more shape. This is purely optional. But it is super easy if you want to do it.
- Sew right on the drawn line and trim excess fabric ¼″ away from the seam. Repeat the same with the other corner.
- Turn the bag right side out. Then put a safety pin at one end of your ribbon to help you thread it through your casing.
- Then simply tie the ends of the ribbon in a knot. And you are done.
Tooth Fairy Pillow
An Amazing sewing project with very easy steps. It is an elegant pillow with a tooth fairy crafted upon it. Every kid today has heard about the tooth fairy, so why not as well sew it onto your kids' favorite pillow?
Things You'll Need
- Card stock
- Scissors
- White felt
- White thread
- Sewing machine
- Loose batting
- Tooth Template
- Black embroidery floss
- 1/4 yard soft fabric (Martha used a 100 percent cotton flannel in light blue)
- Embroidery hoop
- Pins
- Water-soluble marking pen
- Embroidery needle
Steps To Follow
- Print a tooth template on card stock and cut out the shape.
- Trace that shape onto white felt with a water-soluble marking pen, and cut the shape from felt.
- Embroider the face onto the tooth with black embroidery floss. The eyes are French knots, and the mouth is created with a backstitch.
- Cut two pieces of a 9-by-9-inch fabric. Hoop one piece of fabric into an embroidery hoop, and pin tooth in the center.
- Hand-stitch around the edge of the tooth with white thread, leaving the top open, so the tooth becomes a pocket.
- Remove fabric from the hoop and place appliqued side down on the other square of fabric. Pin in place. Sew pieces together around the edges with a 1/4-inch seam allowance, leaving a 4-inch opening for turning the right side out.
- Then trim the corners of the seam allowance and turn the right side out. Stuff with batting and hand-stitch opening closed.
Cute Felt Monsters
The cute felt monsters are a great way to teach your kids to sew. They are the perfect beginner sewing project. You can easily create a combination of different monsters, which could be a perfect lineup and look amazing.
Things You'll Need
- Different colors of felt fabric.
- A cut-out monster template designed by your child.
- Different cut-outs from the felt for different looks (for example, eyes, a smile, and more)
- Stuffing Material
Steps To Follow
- Trace the drawing onto the felt and cut out two pieces of the same size.
- Trace and cut accessories.
- Sew the accessories onto the body using matching thread.
- Place the body with accessories onto the other body piece and pin it.
- Sew around the edges but leave one opening.
- Stuff the bodies through the opening using small amounts of stuffing at a time.
- Use some sharp object such as a pencil to push the stuffing into the arms and legs.
- Stuff it full and then sew the opening and backstitching to secure.
Superhero Mask Pattern
Who doesn't like superheroes? Yeah, everyone does! Children are obsessed with their favorite superheroes. It is a sewing project that your kids would largely love and likely engage them in a productive activity.
Things You'll Need
- A small amount of two colours of fabric (or you can simply use the same color on the front and the back).
- One package double wide folded bias tape in a coordinating color.
- One piece of elastic (about 1 foot long).
Step To Follow
- First, print out your pattern pieces.
- Cut one piece of fabric from the large pattern piece and two from the smaller one. They can either be of the same color or different. It is totally up to you.
- Trace the eye holes with a washable marker or chalk. Then also, trace a dotted line on the smaller pieces.
- Pin the two smaller pieces on the large piece matching up the edges.
- Sew around the eye holes about 1/4 in. outside the markings.
- Using a nice and sharp scissor, cut out the eye holes taking the help of markings.
- Then, pull the small pieces through the eye holes and press them smoothly.
- Fold the front side of the mask in half and pull the two ends of the small pieces around the back so you can sew them together on the dotted line you made before. Make sure you have the right sides together while doing this.
- Now, turn it so that it is all right side out and press it flat.
- Using your bias tape, pin it around the mask and sew it in place.
- To make the elastic band around the head, cut a piece of fabric about 22 in. by 2-3 in. and sew it together the long way.
- Insert your elastic (about 12 in.) into the casing you just made and pull it through, ensure to sew it in place on the starting end, and then pull the fabric down around the elastic and sew it on the other end.
Pencil Case Using Felt
It is surprisingly very easy to make a pencil case from felt. It does involve sewing, but it is so simple that you don’t even have to have a sewing machine.
Things You'll Need
- Felt
- Needle and thread
- Scissors
- Ribbon
- Buttons
- Sewing machine (optional)
Steps To Follow
- Begin by simply cutting your felt sheets to fit. You can use a number of pencils that you want to fit, which would give you an approximate size.
- Cut two felt sheets of a certain size but remember one being somewhat smaller than the longer one.
- Use the needle and thread to tie a button to the pencil case just beneath the opening.
- You can either cut a small opening in the flap for a buttonhole for closure or add a ribbon onto the flap that can loop or wrap around the button. Or you can simply do some of both options.
- Once your Pencil Case is constructed, you can get very much creative with decorating it.
- You can add more buttons just for decoration, fabric paint, sequins, and much more embellishments that your kid likes. Let your kids choose.
- Once you have made a few pencil cases, you could make matching notebooks or book covers too.
Fabric Bookmarks
This simple DIY project is a great way to get your kids excited about reading time! When they create their own bookmarks, they will look forward to using them.
Things You'll Need
- Two scraps of fabric cut to 3″ wide by 7″ tall
- A piece of sturdy cardboard cut to 2″ by 6″.
- A tassel, a scrap of cording or ribbon cut to 3″-4″ in length.
- An iron
Steps To Follow
- Sew a 1/4-inch hem along one short edge of each piece of fabric. Fold the fabric in just with the right side facing down. This way you get a clean hem.
- Then with the right sides together, line up the hemmed edges of both pieces of fabric and sew around the remaining three edges. Use a 1/4-inch seam allowance. You should be stitching a small pouch with the wrong sides of the fabric showing.
- Clip all four corners and turn the right side out with the help of a stick and the hemmed opening.
- Slide cardboard inserts into the fabric sleeves you have just created.
Sewing Projects That Kids Will Love
Sewing projects for kids can be simple and useful. With a little help along the way, your children can learn a new skill while creating marvellous day-to-day accessories that they will love to flaunt. Let us take a look at some quick and fun DIY sewing projects for kids.
- A Doll Skirt
- Elastic Headbands
- Chic Fabric Belts
- Doll Sleeping Bag
- Heart Plushies
- Painted Napkins
- Glove Monsters
- Buttoned Socks
- Fabric Tissue Holders
- Chapstic Sling
- Paintbrushes and Notebook Case
- Superhero Cape
- Cozy Quilt
- Fabric Covered Notebooks
- Fabric Flowers


We Want Your Photos!
More for You


See All
Bachelor of Arts specializing in Fine Art
Rosanna RobertsonBachelor of Arts specializing in Fine Art
Rosanna is a creative and enthusiastic individual who enjoys finding ways to entertain kids through art and crafts, games, and cooking. With a Bachelor's degree in Fine Art from the Central Saint Martins College of Art & Design, she brings a unique perspective to her projects, making them both colorful and educational. She is always full of ideas for homemade cards, handcrafted gifts, toys, and decorations that are perfect for children of all ages.
Disclaimer
1) Kidadl is independent and to make our service free to you the reader we are supported by advertising. We hope you love our recommendations for products and services! What we suggest is selected independently by the Kidadl team. If you purchase using the Buy Now button we may earn a small commission. This does not influence our choices. Prices are correct and items are available at the time the article was published but we cannot guarantee that on the time of reading. Please note that Kidadl is a participant in the Amazon Services LLC Associates Program, an affiliate advertising program designed to provide a means for sites to earn advertising fees by advertising and linking to Amazon. We also link to other websites, but are not responsible for their content.
2) At Kidadl, we strive to recommend the very best activities and events. We will always aim to give you accurate information at the date of publication - however, information does change, so it’s important you do your own research, double-check and make the decision that is right for your family. We recognise that not all activities and ideas are appropriate for all children and families or in all circumstances. Our recommended activities are based on age but these are a guide. We recommend that these ideas are used as inspiration, that ideas are undertaken with appropriate adult supervision, and that each adult uses their own discretion and knowledge of their children to consider the safety and suitability. Kidadl cannot accept liability for the execution of these ideas, and parental supervision is advised at all times, as safety is paramount. Anyone using the information provided by Kidadl does so at their own risk and we can not accept liability if things go wrong.
3) Because we are an educational resource, we have quotes and facts about a range of historical and modern figures. We do not endorse the actions of or rhetoric of all the people included in these collections, but we think they are important for growing minds to learn about under the guidance of parents or guardians.