How To Make A Tudor House Model With Kids


Gallery
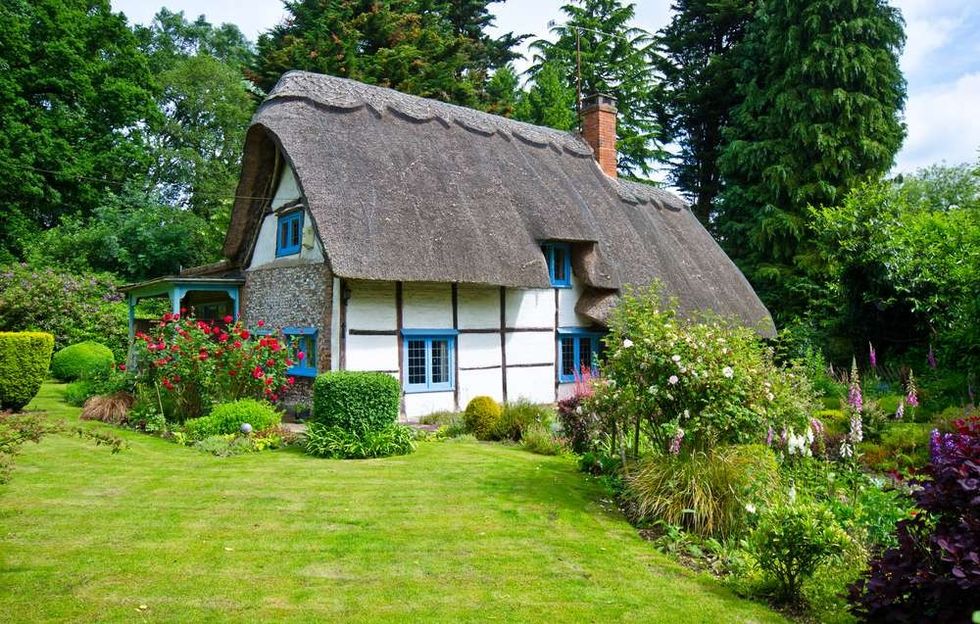
In England during the reign of King Henry VIII, most ordinary Tudor housing was built with a wooden frame that was then filled with sticks and wet clay in a process known as wattle and daub.
As the timber beams were often coated in tar to prevent rotting, this gave these Tudor homes a distinctive black and white exterior and examples of these Tudor buildings can still be seen today, some 500 years later.
They also normally had a tall chimney, steeply pitched roof that was covered in clay or stone roof tiles and a second storey that overhung the first floor, which was known as a jetty.
Have a go at making your very own model of this distinctive form of housing with your kids by following our step by step guide. Not only will these encourage creativity amongst children but it will also spark interesting and educational discussions about life in Tudor times. Have fun!
What Were Tudor Houses Like?
Inside a Tudor house, the same black and white pattern could be seen on the walls and many would have an enclosed fireplace. Tudors houses didn't have a toilet inside though, and only the very wealthy could afford carpet.
Poor Tudor houses were much more simple than this and were made from straw, dung and mud, usually with one room, with a thatched roof and no windows (since only the rich could afford these).
The floor would sometimes be covered with rushes, which are a type of grass, and, although the top of this would be changed, the bottom layers would often be left for many years, making the home smell unpleasant.
Rich Tudor houses, however, were made from brick or stone, had many glass windows, and were incredibly large, having enough rooms to entertain guests and house servants. The inside walls were sometimes painted and were decorated with portraits and tapestries.
Our model Tudor house tutorial is just one of many teaching ideas that can help your KS2 children learn all about this period of English history so, if you are ready, let's get started making some Tudor house models.
Equipment
To Make One Model House, You Will Need:
Two cardboard boxes, one should be slightly smaller than the other.
Sticky tape.
Glue (this can be PVA or glue stick).
White paint.
Two A4 pieces of white card or foam.
Two A4 pieces of black card or foam.
Two A4 pieces of brown card or foam.
One A4 piece of grey card or foam.
A black marker pen.
Ruler.
Scissors.

To Make Your Tudor Style House
1) To begin your Tudor house, first, take your larger box and open up one side so you have two cardboard flaps. These will become the base of your Tudor roof. Bring these together to a point and then tape in place.
2) Next, paint each box white and leave to dry. You may need two or three coats of paint to cover each box entirely.
3) Once dry, place your larger box on top of the smaller box and glue in place. This forms the structure for the Tudor house.
4) Fold one sheet of white A4 card in half and then stick this on to the roof base of your model. Trim any excess card off from around the edges.
5) To make your roof tiles, cut your one piece of brown and the piece of grey card into rectangles measuring approximately 2cm by 3cm. Starting at the bottom of the white card you have just stuck down, glue the tiles on side-by-side to create lines of tiles, making sure they overlap slightly.
You can make a repeating pattern with the grey and brown pieces if you like or place them in random order.
6) Make the door of your Tudor house by cutting a rectangle from the other piece of brown card and stick it to the front of the bottom box. Use the black pen to draw on a door handle.
7) Next, make the windows of your Tudor house. Use the other piece of white card and cut some rectangular pieces out.
You can decide on how many windows you would like depending on how wealthy you think think the people that lived in a house like this may have been!
Using the black marker pen, draw diagonal lines in a criss-cross pattern on your rectangles to make them look like glass and then stick them where you would like them on your house.
8) To make the distinctive beams for your Tudor house, cut the black card into strips approximately 1cm wide and stick these to the exterior walls of your model. These don't have to be perfectly straight lines as they would have been hand-carved on real Tudor houses.
The beams should run vertically and horizontally but you can choose exactly how your beams are placed. Cut some narrower half centimetre strips to stick around the windows and door frame to complete your Tudor house.
Tips And Tricks
Craft teaching ideas like this are a great way to explore the Tudors for kids and can certainly help you learn all about how people lived back then.
As a variation to the model you have built, you could try cutting three out of the four sides of the front of the house to create a hinged door and then decorate the inside of the building to replicate what houses of the time would have looked like.
You can add beams to the inside walls and even create the fire, bits of furniture and belongings from cardboard and other recyclable materials like milk bottle tops and wrappers.
As there were huge differences in the wealth of Tudor people, there are a variety of Tudor house models you could have fun making with your children. Why not also build the richest and poorest Tudor houses to make an entire town and compare the differences in how people lived?
Next time you are out, you could even try spotting Tudor buildings in the area and see how similar they are to the model you made.


We Want Your Photos!
More for You


See All
Master of Science specializing in Criminal Investigation, Criminal Justice/Police Science, PCGE in Primary Education, Professional Diploma in User Experience Design
Jade ScottMaster of Science specializing in Criminal Investigation, Criminal Justice/Police Science, PCGE in Primary Education, Professional Diploma in User Experience Design
Hailing from London, Jade now calls Lincolnshire home and enjoys the serene countryside that surrounds her. She has a wealth of experience as a primary school teacher, possessing a strong understanding of the curriculum, games, activities, and learning opportunities for children aged between 3-11. Jade is constantly on the lookout for new outdoor adventures and educational attractions to share with her two nephews. Her interests in science and crafts also enable her to provide fun, engaging, and educational activities for children to enjoy on rainy days. With a passion for discovering new experiences, she is always seeking out the latest deals and attractions to ensure a memorable time for all.
Disclaimer
1) Kidadl is independent and to make our service free to you the reader we are supported by advertising. We hope you love our recommendations for products and services! What we suggest is selected independently by the Kidadl team. If you purchase using the Buy Now button we may earn a small commission. This does not influence our choices. Prices are correct and items are available at the time the article was published but we cannot guarantee that on the time of reading. Please note that Kidadl is a participant in the Amazon Services LLC Associates Program, an affiliate advertising program designed to provide a means for sites to earn advertising fees by advertising and linking to Amazon. We also link to other websites, but are not responsible for their content.
2) At Kidadl, we strive to recommend the very best activities and events. We will always aim to give you accurate information at the date of publication - however, information does change, so it’s important you do your own research, double-check and make the decision that is right for your family. We recognise that not all activities and ideas are appropriate for all children and families or in all circumstances. Our recommended activities are based on age but these are a guide. We recommend that these ideas are used as inspiration, that ideas are undertaken with appropriate adult supervision, and that each adult uses their own discretion and knowledge of their children to consider the safety and suitability. Kidadl cannot accept liability for the execution of these ideas, and parental supervision is advised at all times, as safety is paramount. Anyone using the information provided by Kidadl does so at their own risk and we can not accept liability if things go wrong.
3) Because we are an educational resource, we have quotes and facts about a range of historical and modern figures. We do not endorse the actions of or rhetoric of all the people included in these collections, but we think they are important for growing minds to learn about under the guidance of parents or guardians.