15 Fun Kids' Gardening Ideas to Inspire Young Green Thumbs


Gallery
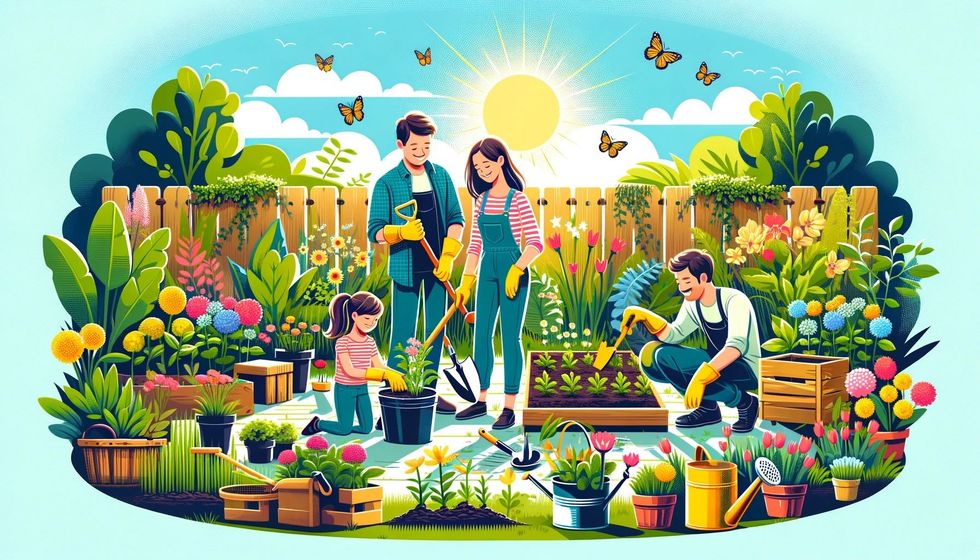
Gardening is a wonderful way to teach children about nature, responsibility, and the joy of nurturing living things. Engaging kids in gardening activities provides them with valuable life lessons and also encourages them to spend more time outdoors and develop a deeper connection with the environment.
From planting seeds to creating cute garden decorations, there are countless gardening ideas to keep your little ones busy and entertained. These hands-on activities offer a fun and educational way for children to learn about the growth cycle of plants, the importance of proper care, and the satisfaction of harvesting their own homegrown veggies.
Whether you have a spacious backyard or a small window sill, you can easily incorporate gardening into your children's daily routine. By involving them in the process of planting, watering, and watching their plants grow, you'll help foster a sense of responsibility and pride in their accomplishments.
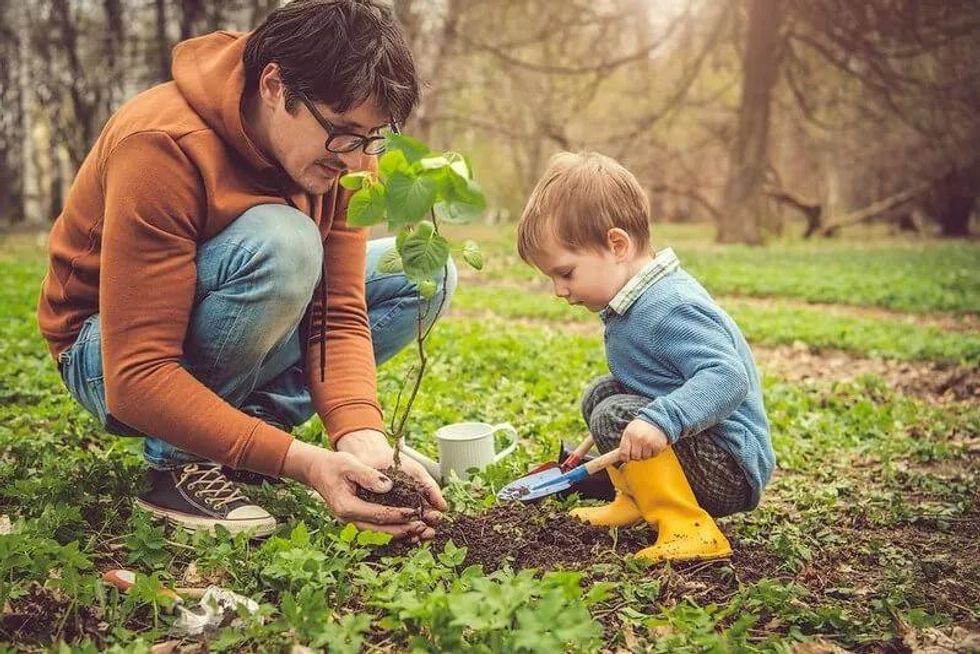
Planting Seeds
 Shutterstock
One of the most basic and essential gardening activities for kids is planting seeds. This simple activity allows children to witness the amazing transformation of a tiny seed into a thriving plant. Here's what you'll need for this activity.
Materials:
- Seeds (easy varieties like sunflowers, beans, or peas)
- Seed starter trays or small pots
- Potting soil
- Water
- Labels or markers
Steps:
- Fill the seed starter trays or pots with potting soil.
- Help your child make small holes in the soil for the seeds.
- Guide them to place the seeds in the holes and gently cover them with soil.
- Water the soil lightly and place the trays or pots in a sunny location.
- Label each tray or pot with the type of seed and the date of planting.
- Encourage your child to water the seeds regularly and observe their growth.
Creating A Bird Feeder
Attract beautiful birds to your garden by creating a simple bird feeder with your kids. This activity adds a decorative element to your outdoor space and teaches children about the importance of caring for wildlife.
Materials:
- Empty plastic bottles or milk cartons
- Twine or string
- Bird seed
- Scissors
- Decorative elements (paint, stickers, or other colorful options)
Steps:
- Clean and dry the plastic bottles or milk cartons thoroughly.
- Cut small holes in the containers, large enough for birds to access the seed.
- Help your child decorate the containers with paint, stickers, or other creative elements.
- Fill the containers with birdseed.
- Tie twine or string around the containers for hanging.
- Hang the bird feeders in your garden or near a window for easy viewing.
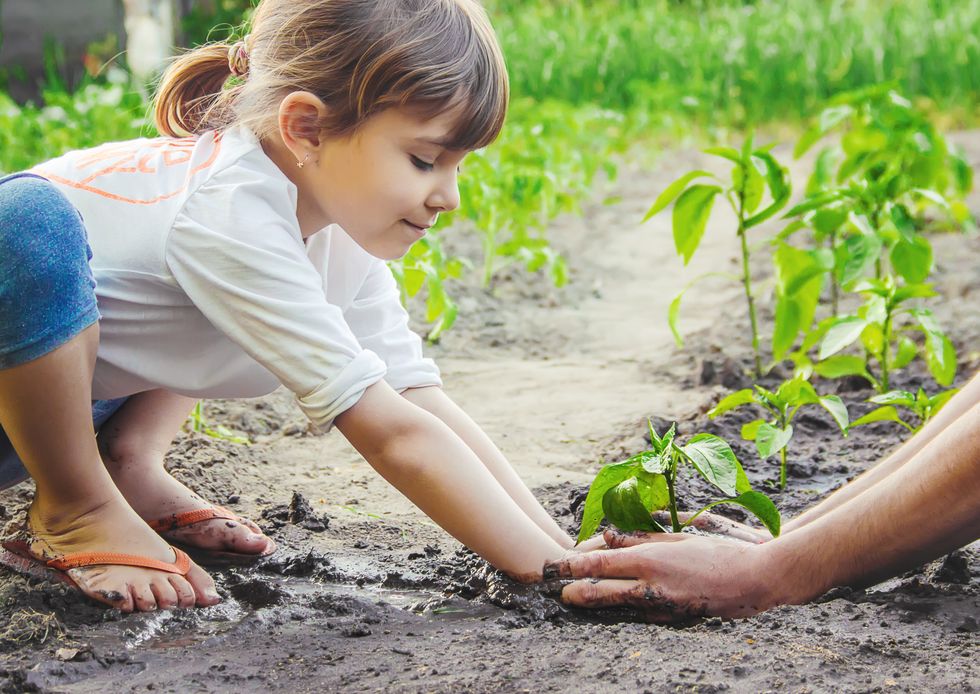
Growing Vegetables
Encourage your children to grow their own food by starting a small vegetable garden. This activity teaches kids about the farm-to-table concept and encourages healthy eating habits.
Materials:
- Vegetable seeds or seedlings (tomatoes, lettuce, carrots, or other options)
- Gardening tools (trowel, watering can, gloves)
- Potting soil or garden bed
- Plant markers
- Water
Steps:
- Choose a sunny location in your garden or prepare containers for planting.
- Help your child loosen the soil and remove any weeds or debris.
- Plant the vegetable seeds or seedlings according to the package instructions.
- Label each plant with a marker to identify the vegetable variety.
- Water the plants regularly and teach your child how to care for them.
- Harvest the vegetables together when they are ready and enjoy them in your meals.
Egg Carton Seed Starters
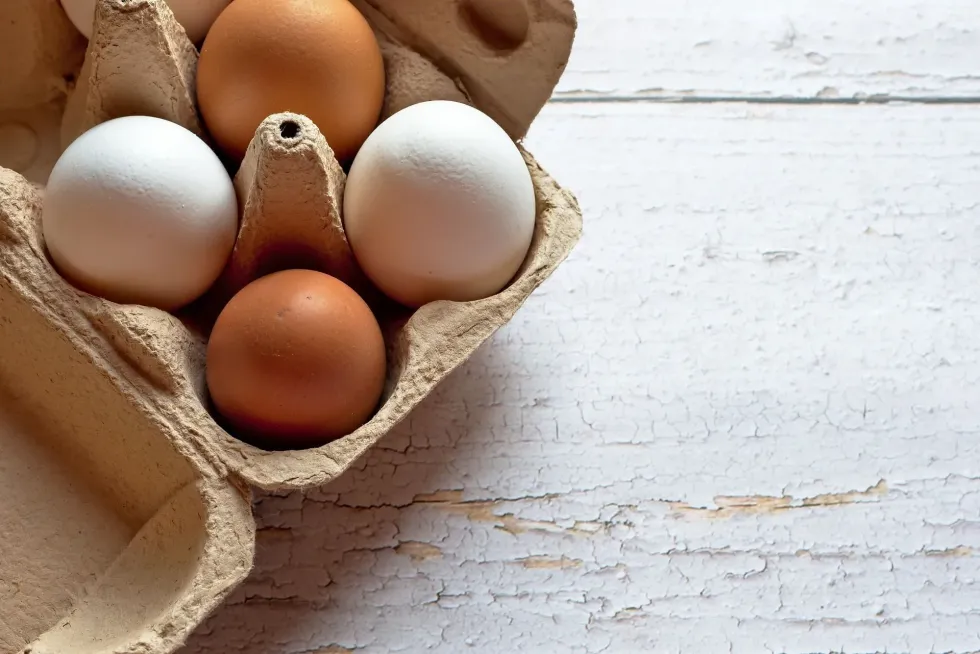
Materials:
- Empty cardboard egg cartons
- Scissors
- Potting soil
- Seeds
- Water
Steps:
- Cut the egg cartons into individual cups, keeping the bottom intact.
- Fill each cup with potting soil.
- Help your child place a seed in each cup and gently cover it with soil.
- Water the soil lightly and place the egg carton in a sunny location.
- Once the seedlings have grown, cut the individual cups and transplant them into the garden or larger pots.
Painted Rock Garden Markers
Add a touch of creativity and a splash of color to your garden by having your kids create painted rock markers! Get them to personalize the rock markers to identify different plants or sections of your garden.
Materials:
- Smooth, flat rocks
- Acrylic paint
- Paint brushes
- Permanent markers
- Clear sealant spray
Steps:
- Collect smooth, flat rocks from your yard or during a nature walk.
- Clean and dry the rocks thoroughly.
- Have your children paint designs or pictures on the rocks using acrylic paint.
- Once the paint is dry, use permanent markers to write the names of plants or garden sections on the rocks.
- Spray the rocks with a clear sealant to protect the designs from the elements.
- Help your kids place the painted rocks in the corresponding areas of your garden.
Create A Fairy Garden
Cultivate your children's imagination by helping them create a magical fairy garden in a corner of your yard or a large container. Let them choose the design, gather materials, and bring an enchanting world to life.
Materials:
- A large container or designated garden space
- Potting soil
- Small plants (succulents or miniature ferns)
- Decorative elements (small stones, figurines, tiny furniture)
- Gardening tools (trowel, watering can)
Steps:
- Choose a location for your fairy garden and prepare the soil.
- Help your child arrange the plants, leaving space for paths and decorative elements.
- Add small stones to create paths and borders.
- Place figurines, tiny furniture, and other decorative elements to bring the fairy garden to life.
- Water the plants regularly and encourage your child to care for their magical creation.
Grow An Herb Garden
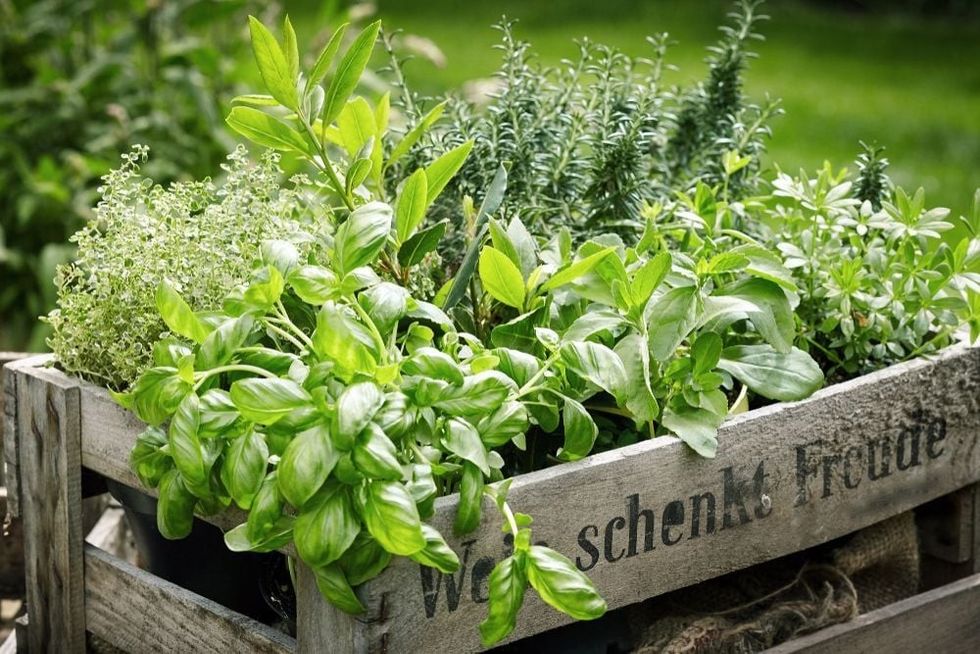
Teach your children about the joys of cooking with fresh herbs by starting an herb garden together. It's a wonderful way to connect with nature and appreciate the journey of food from garden to plate.
Materials:
- Herb seeds or seedlings (basil, mint, parsley)
- Pots or designated garden space
- Potting soil
- Gardening tools (trowel, watering can)
- Labels or markers
Steps:
- Choose a sunny location for your herb garden.
- Help your child fill the pots with potting soil or prepare the garden bed.
- Plant the herb seeds or seedlings according to the package instructions.
- Label each plant with a marker to identify the herb variety.
- Water the herbs regularly and teach your child how to harvest them for use in cooking.
Make A Worm Composting Bin
Introduce your kids to the concept of composting and the importance of worms in maintaining healthy soil. Teach them about reducing waste and creating a more sustainable environment; it's a small change with a big impact!
Materials:
- Large plastic bin with lid
- Drill
- Shredded newspaper
- Food scraps (fruit and vegetable peels, coffee grounds)
- Water
- Red wiggler worms
Steps:
- Drill holes in the bottom and sides of the plastic bin for drainage and ventilation.
- Fill the bin with shredded newspaper and dampen it with water.
- Add a handful of red wiggler worms to the bin.
- Help your child add food scraps to the bin, burying them under the newspaper.
- Keep the bin moist but not soggy, and teach your child how to harvest the rich compost produced by the worms.
Plant A Pizza Garden
Encourage your kids to grow their own pizza toppings by planting a pizza garden. It's a fun and rewarding way to learn where food comes from, and to customize their favorite pizzas with fresh, homegrown ingredients.
Materials:
- Seeds or seedlings (tomatoes, basil, oregano, peppers)
- Pots or designated garden space
- Potting soil
- Gardening tools (trowel, watering can)
- Labels or markers
Steps:
- Choose a sunny location for your pizza garden.
- Help your child fill the pots with potting soil or prepare the garden bed.
- Plant the seeds or seedlings according to the package instructions.
- Label each plant with a marker to identify the variety.
- Water the plants regularly and teach your child how to harvest the ingredients for making delicious homemade pizzas.
Create Garden Art
Encourage your child's creativity with a garden decorating adventure. Gather simple supplies and let them create colorful garden art that brings your outdoor space to life. Here's what you'll need.
Materials:
- Terracotta pots
- Acrylic paint
- Paint brushes
- Clear sealant spray
- Potting soil
- Plants or seeds
Steps:
- Clean and dry the terracotta pots thoroughly.
- Have your children paint designs or patterns on the pots using acrylic paint.
- Once the paint is dry, spray the pots with a clear sealant to protect the designs from the elements.
- Fill the painted pots with potting soil and plant seeds or seedlings.
- Place the colorful pots around your garden to add a touch of whimsy and creativity.
Build A Toad House
Attract beneficial toads to your garden and transform it into a magical place. Create a cozy toad house with your kids and watch these gentle creatures help your garden thrive.
Materials:
- Large clay pot
- Smaller clay pot
- Potting soil
- Plants (ferns, moss, etc.)
- Decorative elements (small stones, twigs)
Steps:
- Place the large clay pot upside down in a shady, damp area of your garden.
- Position the smaller clay pot on its side in front of the large pot to create an entrance.
- Cover the pots with soil and plants to create a natural-looking toad habitat.
- Add small stones and twigs to decorate the toad house and provide additional hiding spots.
- Encourage your child to observe the toad house regularly to see if any toads have moved in.
Make Seed Bombs
Create seed bombs with your kids to help plant wildflowers in your community and brighten your neighborhood. It's a fun way to give back to nature or to give thoughtful gifts to friends and family.
Materials:
- Clay
- Compost
- Wildflower seeds
- Water
- Mixing bowl
Steps:
- In a mixing bowl, combine equal parts clay and compost.
- Add a small handful of wildflower seeds to the mixture.
- Slowly add water to the mixture until it reaches a dough-like consistency.
- Help your child shape the mixture into small balls (seed bombs).
- Allow the seed bombs to dry completely.
- Toss the seed bombs in areas where you'd like to see wildflowers grow or give them as gifts.
Plant A Butterfly Garden
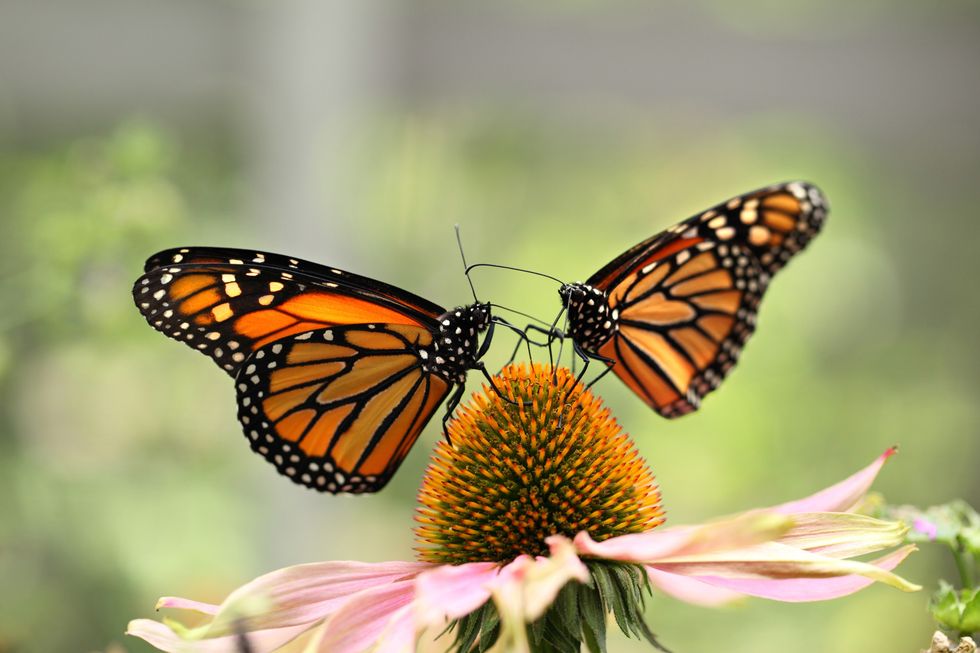 Shutterstock
Attract beautiful butterflies to your yard by planting a butterfly garden with your kids. It's a fun way to learn about nature together and create a special place for these delicate creatures.
Materials:
- Seeds or seedlings (butterfly-friendly plants like milkweed, zinnias, and marigolds)
- Pots or designated garden space
- Potting soil
- Gardening tools (trowel, watering can)
- Labels or markers
Steps:
- Choose a sunny location for your butterfly garden.
- Help your child fill the pots with potting soil or prepare the garden bed.
- Plant the seeds or seedlings according to the package instructions.
- Label each plant with a marker to identify the variety.
- Water the plants regularly and teach your child about the importance of providing nectar sources for butterflies.
Create A Sensory Garden
Engage your child's senses by creating a sensory garden designed just for them. Fill it with a variety of plants that stimulate touch, smell, sight, and sound, providing endless opportunities for discovery and delight.
Materials:
- Seeds or seedlings (fragrant herbs, textured plants, colorful flowers, rustling grasses)
- Pots or designated garden space
- Potting soil
- Gardening tools (trowel, watering can)
- Labels or markers
Steps:
- Choose a location for your sensory garden.
- Help your child fill the pots with potting soil or prepare the garden bed.
- Plant the seeds or seedlings according to the package instructions, focusing on a variety of sensory experiences.
- Label each plant with a marker to identify the variety.
- Encourage your child to explore the garden using their senses, touching soft lamb's ear, smelling fragrant lavender, and listening to the rustling of ornamental grasses.
Grow A Three Sisters Garden
Teach your children about the Native American tradition of planting a Three Sisters Garden; it's a hands-on way to learn about teamwork in nature. Get them to plant corn, beans, and squash, and watch how these plants thrive together.
Materials:
- Seeds (corn, pole beans, squash)
- Designated garden space
- Gardening tools (trowel, watering can)
- Compost or fertilizer
Steps:
- Choose a sunny location for your Three Sisters Garden.
- Help your child prepare the garden bed by mixing in compost or fertilizer.
- Plant the corn seeds in mounds, leaving space for the beans and squash.
- Once the corn has grown a few inches tall, plant the pole bean seeds next to the corn stalks.
- Plant the squash seeds in mounds in each row between the corn and bean mounds.
- Water the plants regularly and teach your child about the symbiotic relationship between the three plants.
FAQs
What are some easy plants for kids to grow?
Some easy plants for kids to grow include sunflowers, beans, peas, lettuce, and radishes. These plants are hardy, fast-growing, and require minimal care, making them perfect for young gardeners.
How can I make gardening fun for my children?
Make gardening fun for your children by incorporating creative activities, such as painting garden markers, decorating pots, or having a treasure hunt in the garden.
You can also turn gardening into a game by challenging your kids to see who can grow the tallest sunflower or find the most unusual-shaped vegetable.
What are the benefits of involving children in gardening?
Involving children in gardening offers numerous benefits, such as teaching responsibility, patience, and the value of hard work.
It also encourages healthy eating habits, provides opportunities for physical activity, and fosters a connection with nature. Additionally, gardening can help develop fine motor skills, problem-solving abilities, and scientific understanding.
Gardening is a fun and rewarding activity that allows children to connect with nature, learn valuable life skills, and develop a sense of pride in their accomplishments.
By providing your kids with a variety of engaging gardening ideas, you'll help cultivate their curiosity, creativity, and love for the great outdoors. So, gather your tools, pick your seeds, and embark on a wonderful gardening adventure with your little ones!
- Gardening with Kids - Child Led Activities - Homeschool Gardens ›
- 12 Fun Garden Activities To Do With Your Kids | Jung Seed's ... ›
- Hands On Gardening Activities for Kids They Will Love ›
- 14 Gardening Projects for Kids | BBC Gardeners World Magazine ›
- Gardening for kids: 10 brilliant garden projects to do with children ... ›


We Want Your Photos!
More for You


Sources
See All
Bachelor of Science specializing in Human Anatomy
Joan AgieBachelor of Science specializing in Human Anatomy
With 3+ years of research and content writing experience across several niches, especially on education, technology, and business topics. Joan holds a Bachelor’s degree in Human Anatomy from the Federal University of Technology, Akure, Nigeria, and has worked as a researcher and writer for organizations across Nigeria, the US, the UK, and Germany. Joan enjoys meditation, watching movies, and learning new languages in her free time.
Bachelor of Science in Mathematics & Computer Science

Ijeoma AsuohaBachelor of Science in Mathematics & Computer Science
Ijeoma is a passionate mathematics and computer science graduate with a penchant for problem-solving and education. Growing up in a large family, she developed a strong sense of responsibility and a love for nurturing young minds. Driven by her natural inclination, Ijeoma often found herself tutoring and mentoring her little cousins and nephews, and She discovered a deep satisfaction in witnessing their growth. Her interactions with her family members sparked a desire to pursue a career where she could combine her technical expertise with her passion for education. Inspired by Kidadl's mission to empower young learners through engaging content, Ijeoma is eager to contribute her skills and knowledge to the team. With her background in mathematics and computer science, coupled with her nurturing nature and teaching experience, she aspires to create impactful educational resources that spark curiosity and inspire learning in children worldwide.
Disclaimer
1) Kidadl is independent and to make our service free to you the reader we are supported by advertising. We hope you love our recommendations for products and services! What we suggest is selected independently by the Kidadl team. If you purchase using the Buy Now button we may earn a small commission. This does not influence our choices. Prices are correct and items are available at the time the article was published but we cannot guarantee that on the time of reading. Please note that Kidadl is a participant in the Amazon Services LLC Associates Program, an affiliate advertising program designed to provide a means for sites to earn advertising fees by advertising and linking to Amazon. We also link to other websites, but are not responsible for their content.
2) At Kidadl, we strive to recommend the very best activities and events. We will always aim to give you accurate information at the date of publication - however, information does change, so it’s important you do your own research, double-check and make the decision that is right for your family. We recognise that not all activities and ideas are appropriate for all children and families or in all circumstances. Our recommended activities are based on age but these are a guide. We recommend that these ideas are used as inspiration, that ideas are undertaken with appropriate adult supervision, and that each adult uses their own discretion and knowledge of their children to consider the safety and suitability. Kidadl cannot accept liability for the execution of these ideas, and parental supervision is advised at all times, as safety is paramount. Anyone using the information provided by Kidadl does so at their own risk and we can not accept liability if things go wrong.
3) Because we are an educational resource, we have quotes and facts about a range of historical and modern figures. We do not endorse the actions of or rhetoric of all the people included in these collections, but we think they are important for growing minds to learn about under the guidance of parents or guardians.